# Mihai Serban — Full Content
> Software engineer sharing insights on JavaScript, React, AWS, mobile development, and building products. Tutorials, deep dives, and project showcases.
## About
Hi! I'm Mihai, a Software Engineer from Cluj-Napoca, Romania. I like to consider myself a generalist. Over the course of my career I've had the opportunity to work with a large number of technologies.
These days I mostly build Web products using ReactJS and NodeJS, and mobile applications for iOS.
Also, I'm a huge Pokémon nerd and coffee addict 😅
Ever since I was a child I had a passion for computers. Here's me at the age of 6, playing on my first computer, a __Intel 80286__.

If you want to learn more about projects I've been involved in, head over to [Projects](https://www.mihaiserban.dev/projects "Projects page").
## Blog Posts
### 1. An Example Semantic-Search Pipeline: Recall, Ranking, Freshness (2026-07-15)
URL: https://mihaiserban.dev/blog/semantic-search-assembly-reconstruction/
### 2. Moving Agent Results into Files and Starting Synthesis with a Fresh Context (2026-07-15)
URL: https://mihaiserban.dev/blog/governance-worker-synthesis-assembly-reconstruction/
### 3. Training a Small Classifier to Route Coding Requests (2026-07-15)
URL: https://mihaiserban.dev/blog/neural-router-assembly-reconstruction/
### 4. Runtime Skill Evals: An Assembly-Theoretic Reconstruction (2026-07-15)
URL: https://mihaiserban.dev/blog/runtime-skill-evals-as-assembly-theory/
### 5. Runtime Skill Evals With Pi: Measuring What Agent Skills Actually Change (2026-07-10)
URL: https://mihaiserban.dev/blog/runtime-skill-evals-with-pi/
### 6. Training a Small Classifier to Route My Coding Requests (2026-07-07)
URL: https://mihaiserban.dev/blog/neural-llm-router-coding-assistant/
### 7. Moving Agent Results into Files and Starting Synthesis with a Fresh Context (2026-07-05)
URL: https://mihaiserban.dev/blog/replacing-orchestrator-agents-with-governance-worker-synthesis/
### 8. Building a Pattern Generator for My Front Gate (2026-06-09)
URL: https://mihaiserban.dev/blog/building-a-design-pattern-generator-for-cnc-laser-cutting/
### 9. A Two-Stage Search Pipeline for a Knowledge Base (2026-05-06)
URL: https://mihaiserban.dev/blog/building-semantic-search-over-a-knowledge-base/
### 10. Cloning a Windows Drive from macOS with dd (2021-01-07)
URL: https://mihaiserban.dev/blog/cloning-windows-drive-from-mac-os-x-using-dd-disk-destroyer/
### 11. How to handle AWS SES bounces and complaints (2018-11-01)
URL: https://mihaiserban.dev/blog/how-to-handle-aws-ses-bounces-and-complaints/
### 12. How to fix broken images in React. (2018-10-24)
URL: https://mihaiserban.dev/blog/how-to-fix-broken-images-in-react/
### 13. ES6 cheatsheet: Arrow Functions (2018-10-20)
URL: https://mihaiserban.dev/blog/javascript-es6-cheatsheet-arrow-functions/
### 14. JavaScript cheatsheet: Async/Await (ES2017) (2018-10-20)
URL: https://mihaiserban.dev/blog/javascript-es6-cheatsheet-async-await/
### 15. ES6 cheatsheet: Classes (2018-10-20)
URL: https://mihaiserban.dev/blog/javascript-es6-cheatsheet-classes/
### 16. ES6 cheatsheet: Destructuring (2018-10-20)
URL: https://mihaiserban.dev/blog/javascript-es6-cheatsheet-destructuring/
### 17. ES6 cheatsheet: Generators (2018-10-20)
URL: https://mihaiserban.dev/blog/javascript-es6-cheatsheet-generators/
### 18. ES6 cheatsheet: Getter and setter functions (2018-10-20)
URL: https://mihaiserban.dev/blog/javascript-es6-cheatsheet-getter-and-setter-functions/
### 19. ES6 cheatsheet: Helpful array functions (2018-10-20)
URL: https://mihaiserban.dev/blog/javascript-es6-cheatsheet-helpful-array-functions/
### 20. ES6 cheatsheet: Helpful string functions (2018-10-20)
URL: https://mihaiserban.dev/blog/javascript-es6-cheatsheet-helpful-string-functions/
### 21. ES6 cheatsheet: Map & WeakMap (2018-10-20)
URL: https://mihaiserban.dev/blog/javascript-es6-cheatsheet-map-weakmap/
### 22. ES6 cheatsheet: Modules (2018-10-20)
URL: https://mihaiserban.dev/blog/javascript-es6-cheatsheet-modules/
### 23. ES6 cheatsheet: Promises (2018-10-20)
URL: https://mihaiserban.dev/blog/javascript-es6-cheatsheet-promises/
### 24. ES6 cheatsheet: Set & WeakSet (2018-10-20)
URL: https://mihaiserban.dev/blog/javascript-es6-cheatsheet-set-weakset/
### 25. ES6 cheatsheet: Spread Operator (2018-10-20)
URL: https://mihaiserban.dev/blog/javascript-es6-cheatsheet-spread-operator/
### 26. ES6 cheatsheet: String Templates (2018-10-16)
URL: https://mihaiserban.dev/blog/javascript-es6-cheatsheet-string-templates/
### 27. ES6 cheatsheet: Variable Declarations (2018-10-16)
URL: https://mihaiserban.dev/blog/javascript-es6-cheatsheet-variable-declarations/
### 28. How I grew my Twitter followers from 435 to 1000 in just 12 days 👏👏👏 (2018-05-11)
URL: https://mihaiserban.dev/blog/how-i-grew-my-twitter-followers-from-500-to-1000-in-just-12-days/
### 29. How to generate cryptocurrency time intervals using MongoDB Aggregation Framework and Node.js (2017-08-23)
URL: https://mihaiserban.dev/blog/aggregate-mongodb-data-with-node-js-and-mongoose-cryptocurrency-financial-time-series/
## Projects
### 1. Blitzer.de (2010-05-31)
URL: https://mihaiserban.dev/project/blitzer_de/
Technologies: Objective-C, C++, SQLite
Platforms: iOS
### 2. Callsign (2018-07-31)
URL: https://mihaiserban.dev/project/callsign/
Technologies: ReactJS, Javascript, Redux, CSS3, docker, BABEL, D3.js
Platforms: Web
### 3. Creative Navy (2019-06-30)
URL: https://mihaiserban.dev/project/creative-navy/
Technologies: ReactJS, Gatsby, CSS3, Javascript
Platforms: Web, Mobile
### 4. ELHO Sales Application (2013-07-31)
URL: https://mihaiserban.dev/project/elho/
Technologies: Objective-C
Platforms: iOS
### 5. ForeverMap (2010-05-31)
URL: https://mihaiserban.dev/project/forevermap/
Technologies: Objective-C, C++, CI/CD, Unit testing
Platforms: iOS
### 6. Geobrain (2010-05-31)
URL: https://mihaiserban.dev/project/geobrain/
Technologies: Objective-C, C++, OpenGL ES
Platforms: iOS
### 7. impetus (2018-10-02)
URL: https://mihaiserban.dev/project/impetus/
Technologies: ReactJS, NEXT.JS, Javascript, CSS3, CI/CD
Platforms: Web
### 8. NextNomads (2014-05-31)
URL: https://mihaiserban.dev/project/next_nomads/
Technologies: Objective-C
Platforms: iOS
### 9. Scout Global (2010-09-30)
URL: https://mihaiserban.dev/project/scout_global/
Technologies: Objective-C, Swift, C++, CI/CD, Unit testing, mongoDB
Platforms: iOS
### 10. WeStyle (2013-08-31)
URL: https://mihaiserban.dev/project/we_style/
Technologies: Objective-C
Platforms: iOS
## Experience
- **Independent Contractor** (2017-11-29T00:00+03:00 — 2021-11-01T00:00+02:00)
- **iOS Developer** at skobbler (aquired by Telenav Inc.) (2010-06-01T00:00+03:00 — 2012-08-01T00:00+03:00)
- **Mentorship Program** at ITBrainiacs (Apex-Edu & Telenav collaboration) (2014-11-01T00:00+03:00 — 2015-05-01T00:00+03:00)
- **Paternity Leave/Career break** (2021-11-01T00:00+03:00 — 2024-06-01T00:00+02:00)
- **Quality Assurance Engineer** at skobbler (acquired by Telenav Inc.) (2009-07-01T00:00+03:00 — 2010-06-01T00:00+03:00)
- **Senior iOS Developer** at 3Pillar Global (2013-01-01T00:00+03:00 — 2013-09-30T00:00+03:00)
- **Senior iOS Developer** at Neosteq (2012-08-01T00:00+03:00 — 2013-01-01T00:00+03:00)
- **Senior Software Engineer - Contractor** at Flutter Entertainment (2019-07-01T00:00+02:00 — 2021-11-07T00:00+02:00)
- **Senior Software Engineer** at Flutter Entertainment
- **Senior Software Engineer** at Telenav Inc. (2014-03-01T00:00+03:00 — 2017-11-30T00:00+03:00)
## Full Content
### bio.md
Hi! I'm Mihai, a Software Engineer from Cluj-Napoca, Romania. I like to consider myself a generalist. Over the course of my career I've had the opportunity to work with a large number of technologies.
These days I mostly build Web products using ReactJS and NodeJS, and mobile applications for iOS.
Also, I'm a huge Pokémon nerd and coffee addict 😅
Ever since I was a child I had a passion for computers. Here's me at the age of 6, playing on my first computer, a __Intel 80286__.

If you want to learn more about projects I've been involved in, head over to [Projects](https://www.mihaiserban.dev/projects "Projects page").
---
### aggregate-mongodb-data-with-node-js-and-mongoose-cryptocurrency-financial-time-series.md

This example groups stored cryptocurrency ticker snapshots into five-minute price summaries using MongoDB's aggregation pipeline.
> **Updated 2026-09-13:** The original pipeline had undefined variables and did not sort ticks before using `$first` and `$last`. The percentage calculation now runs inside the aggregation pipeline. Bitfinex's ticker `volume` is a rolling 24-hour value, so its change is labeled accordingly rather than presented as volume traded in the interval.
The data here comes from Bitfinex ticker snapshots. A snapshot includes the latest price and rolling 24-hour statistics; it is not a record of every trade. Bitfinex also provides [candles](https://docs.bitfinex.com/reference/rest-public-candles) for interval-based market data, so use that endpoint when exchange-generated candles meet your needs.
Here is the historical ticker payload used in this example:
```json
{
"mid":"244.755",
"bid":"244.75",
"ask":"244.76",
"last_price":"244.82",
"low":"244.2",
"high":"248.19",
"volume":"7842.11542563",
"timestamp":"1444253422.348340958"
}
```
The `low`, `high` and `volume` fields cover a rolling 24-hour window. We’ll group the sampled `last_price` values by time. Missing snapshots can hide price extremes, so the result is a summary of the collected samples rather than a complete trade-based candle.
Store the data in MongoDB, converting the source timestamp from Unix seconds to a JavaScript `Date` for `created_at`. Otherwise the schema's default records ingestion time, which can put delayed snapshots into the wrong interval. The snippets below assume an established Mongoose connection.
Our model looks like this:
```
const mongoose = require('mongoose');
const { Schema } = mongoose;
const tickerSchema = new Schema({
bid: Number,
bid_size: Number,
ask: Number,
ask_size: Number,
daily_change: Number,
daily_change_perc: Number,
last_price: Number,
volume: Number,
high: Number,
low: Number,
created_at: { type: Date, required: true, default: Date.now },
symbol: String,
exchange: String
});
const Ticker = mongoose.model('Ticker', tickerSchema);
```
Now that we have the data store we can go ahead and create our [Mongo Aggregation pipeline](https://docs.mongodb.com/manual/aggregation/) to extract the ticks in time intervals we need.
```
const pair = 'tETHUSD'
const exchange = 'Bitfinex'
const periodMinutes = 5; // time interval to process data
const minutesAgo = 30;
let startDate = new Date()
startDate.setMinutes(startDate.getMinutes() - minutesAgo)
const endDate = new Date()
const operations = [
{
$match: {
created_at: {$gte: startDate, $lt: endDate},
symbol: pair,
exchange: exchange
}
},
{
$sort: {
created_at: 1,
_id: 1
}
},
{
$group: {
_id: {
$add: [
{ $subtract: [
{ $subtract: [ "$created_at", new Date(0) ] },
{ $mod: [
{ $subtract: [ "$created_at", new Date(0) ] },
1000 * 60 * periodMinutes
]}
]}, new Date(0)]
},
first_close: {$first: "$last_price"},
last_close: {$last: "$last_price"},
first_volume: {$first: "$volume"},
last_volume: {$last: "$volume"},
high: {$max: "$last_price"},
low: {$min: "$last_price"},
}
},
{
$project: {
_id: 1,
period_change: { $subtract: [ '$last_close', '$first_close' ] },
period_change_perc: {
$cond: [
{ $eq: ['$first_close', 0] },
null,
{
$multiply: [
{ $subtract: [{ $divide: ['$last_close', '$first_close'] }, 1] },
100
]
}
]
},
open: '$first_close',
close: '$last_close',
rolling_volume_change: { $subtract: [ '$last_volume', '$first_volume' ] },
high: '$high',
low: '$low'
}
},
{
$sort: {
_id: 1
}
}
];
Ticker.aggregate(operations)
.then(results => console.log(results))
.catch(error => console.error(error));
```
Our aggregation pipeline consists of 5 operations:
1. __$match__ : filters the tick data based on date, symbol and exchange
2. __$sort__ : orders ticks chronologically before `$first` and `$last` are used. `_id` makes ties deterministic.
3. __$group__ : groups the data returned by the match operation into periods, in our case 5 minutes. Here we also compute additional value such as the new highs and lows for the periods, first close, last close, first volume, last volume.
4. __$project__ : the data resulting from the `$group` operation is passed into the `$project` phase, where we use [operators](https://docs.mongodb.com/manual/reference/operator/aggregation/) to compute the final output. For example, `period_change` is *last_close* - *first_close*, `period_change_perc` is that change as a percentage of *first_close*, and `rolling_volume_change` is the change in the ticker's rolling 24-hour volume.
5. __$sort__ : sorts the resulting periods in ascending order
Output of our aggregation is an array of aggregated tickers at 5 minute intervals:
```
[
{ _id: 2017-08-24T07:15:00.000Z,
period_change: 0.2400000000000091,
period_change_perc: 0.07518796992481488,
open: 319.2,
close: 319.44,
rolling_volume_change: -52.8511199200002,
high: 319.44,
low: 319.2 },
{ _id: 2017-08-24T07:20:00.000Z,
period_change: 0.07999999999998408,
period_change_perc: 0.025043826696714275,
open: 319.44,
close: 319.52,
rolling_volume_change: 18.845093469994026,
high: 319.52,
low: 319.44 }
]
```
References:
**Aggregation - MongoDB Manual 3.4**
[Aggregation operations process data records and return computed results.](https://docs.mongodb.com/manual/aggregation/)
**General**
[Current Version Bitfinex Websocket API version is 2.0](https://docs.bitfinex.com/v2/docs/ws-general)
---
### building-a-design-pattern-generator-for-cnc-laser-cutting.md
I wanted a metal front gate with a perforated pattern. When I called laser-cutting shops, they asked for a CAD file. I had an idea of the pattern, but no drawing to send them.
I tried drawing patterns in Figma. Changing the spacing meant selecting, moving and copying shapes again. I wanted to adjust a few numbers and see what they would look like on a two-meter panel.
I built the [Design Pattern Generator](/design-pattern-generator) to do that in the browser and export a DXF. It's a React page on this Gatsby site; generating the pattern and exporting files happen locally, without an account or an upload.
## From settings to cutouts
The generator supports circles, squares and horizontal or vertical slots. I can change the sheet dimensions, margins, spacing and cutout size, then use a density gradient to vary the pattern across the panel. Squares and slots can have rounded corners.
The engine returns shape descriptors, which the SVG preview renders. Here's a circle-pattern example with the margins supplied explicitly:
```javascript
const shapes = generatePattern({
width: 1000,
height: 2000,
marginTop: 50,
marginBottom: 50,
marginLeft: 50,
marginRight: 50,
shapeType: 'circle',
shapeSize: 20,
spacing: 40,
opacity: 30,
gradientType: 'topToBottom',
});
```
The `opacity` setting controls the target placement density, despite its name. It does not make the shapes translucent or specify the percentage of metal removed.
For circles and squares, the engine builds a grid and decides which cells receive a cutout. It combines random placement with the 7/16, 3/16, 5/16 and 1/16 error-distribution weights from Floyd–Steinberg dithering. That spreads placement error across neighboring cells. The grid stays regular, but the occupied cells vary.
Slots use a separate loop. It samples lengths between the configured minimum and maximum, leaves spacing between slots and uses the local density to decide whether to skip a position. This path does not use the grid's error diffusion.
The directional density curve has an exponent of 1.8 and a floor of 10% of the density setting. That floor applies to the placement target, not a guaranteed number of cutouts. Generating the pattern again can change the result because the engine uses `Math.random()`.
## Exporting a drawing
The preview uses SVG, and the download options are PDF and DXF.
The PDF exporter uses `svg2pdf.js` and includes padding and a block of settings beside the drawing. Its page is therefore larger than the configured sheet. Print without “fit to page” scaling if you need to preserve the drawing scale.
The DXF exporter writes circles as `CIRCLE` entities and slot and polygon outlines as closed `LWPOLYLINE` entities. The coordinates follow the tool's millimeter dimensions. Check the import units and geometry with the shop before cutting; a file format alone does not guarantee that every CAD/CAM setup interprets it as intended.
## What the coverage number means
The coverage display is an estimate. The current calculation adds up circle areas and rectangular areas for squares and slots, then divides by the sheet's width times height. It does not subtract rounded corners or use the actual area of a nonrectangular sheet.
For example, rounding a 20 mm square into a circle reduces its area from 400 mm² to about 314 mm², but the square calculation still counts 400 mm². The number is useful for comparing patterns with similar geometry; it is not an exact material-removal measurement.
It also does not calculate panel strength or sound transmission. Material, thickness, remaining connections and mounting all matter to the finished panel. More cutout area means more open area, not proof that a gate is structurally suitable.
## The gate pattern
I used vertical slots 30 mm wide and 100–400 mm long, with a density gradient and gaps between them. The DXF went to the laser shop. The roughly 35% cutout figure is an estimate, subject to the calculation limits above.
Adjusting the parameters was much quicker than redrawing the pattern in Figma. I could compare several versions at the panel's dimensions before choosing a file to send.
You can [try the generator](/design-pattern-generator) with your own dimensions and export the result as PDF or DXF.
---
### building-semantic-search-over-a-knowledge-base.md
A search for *"how do I take money out of my account"* should find an article called *"Withdrawal Methods"*. A keyword retriever can miss that connection when the indexed text lacks matching words or synonyms. An embedding model may retrieve it because the two texts express a similar intent.
This is an example architecture for that kind of knowledge-base search. The candidate counts and ranking scores below are illustrative, not measurements from a deployed system.
## Retrieve candidates, then rerank them
A bi-encoder embeds documents independently of queries. Store the document vectors ahead of time, then embed each query and retrieve nearby vectors. A cross-encoder can score the resulting query-document pairs together, using both texts to decide their relevance. That second step adds work for every candidate, so keep the candidate set bounded.
```text
Query → Query embedding → Vector search → 30 chunks → Reranker → Article results
```
For the withdrawal query, retrieval might return chunks from *Withdrawal Methods*, *Bank Transfer Limits*, *ATM Cash Withdrawal* and *Account Closure*. The reranker can reorder those chunks, after which the API groups them into article results. It cannot recover an article that retrieval never supplied.
Two stages are an option to evaluate, not a requirement for every search feature. Compare against a lexical baseline such as BM25, especially when users paste error codes, product identifiers or API names. A hybrid retriever can combine lexical and vector candidates using a method such as Reciprocal Rank Fusion before reranking. Measure whether the extra retrieval and inference improve your own queries. [pgvector's hybrid-search examples](https://github.com/pgvector/pgvector#hybrid-search) show how these pieces can fit together.
## Model choice includes language and input formatting
One possible embedding model is [`intfloat/multilingual-e5-small`](https://huggingface.co/intfloat/multilingual-e5-small), which produces 384-dimensional vectors. For retrieval, its inputs should start with `query: ` or `passage: `, including non-English text:
```text
query: how do I take money out of my account
passage: Withdrawal Methods. You can withdraw funds by ...
```
Follow the model's pooling and normalization instructions. L2 normalization makes the dot product equal cosine similarity; it does not calibrate relevance across queries. A score of 0.8 on one query need not mean the same thing as 0.8 on another.
For English, [`cross-encoder/ms-marco-TinyBERT-L2-v2`](https://huggingface.co/cross-encoder/ms-marco-TinyBERT-L2-v2) is a small reranker to evaluate. Its model card is tagged English and describes MS MARCO training. Pairing it with a multilingual embedding model does not establish multilingual ranking quality. A multilingual knowledge base needs reranker evaluation in its supported languages too.
Benchmark inference with your text lengths, candidate count, batch size and expected concurrency. A CPU deployment may be sufficient; these model names alone do not establish a latency target or whether a GPU is economical.
## Store chunks in PostgreSQL
If the application already uses PostgreSQL, pgvector lets the search data share its database and transactions. Here is a starting schema for the 384-dimensional model:
```sql
CREATE EXTENSION IF NOT EXISTS vector;
CREATE TABLE embeddings (
id BIGSERIAL PRIMARY KEY,
article_id TEXT NOT NULL,
tenant TEXT NOT NULL,
language TEXT NOT NULL,
chunk_type TEXT NOT NULL,
text TEXT NOT NULL,
embedding VECTOR(384) NOT NULL,
created_at TIMESTAMPTZ DEFAULT NOW()
);
CREATE INDEX ON embeddings
USING hnsw (embedding vector_cosine_ops);
CREATE INDEX ON embeddings (tenant, language);
```
The following parameterized query uses `$1` for the query vector, `$2` for the tenant and `$3` for the language:
```sql
SELECT article_id, chunk_type, text,
1 - (embedding <=> $1::vector) AS similarity
FROM embeddings
WHERE tenant = $2
AND language = $3
ORDER BY embedding <=> $1::vector
LIMIT 30;
```
Ordering by the distance operator with a limit makes the query eligible to use the HNSW index; PostgreSQL still chooses the plan. Check it with `EXPLAIN ANALYZE` on representative data.
There is a filtering catch: with approximate indexes, pgvector applies filters after scanning index candidates. A selective tenant or language filter can therefore leave fewer than 30 results. Starting with pgvector 0.8.0, iterative index scans can search further, up to their configured limits. Depending on the workload, exact search over filtered rows, partitioning or partial indexes may be appropriate. Measure recall as well as query time. [pgvector filtering documentation](https://github.com/pgvector/pgvector#filtering)
A tenant column is one storage design, not an authorization boundary by itself. Derive the tenant from authenticated context and enforce article access rules in retrieval. Choose shared tables, row-level security or stronger separation according to the application's isolation requirements.
## Chunking changes what can be found
A long article can exceed the embedding model's input limit or contain several topics that fit poorly into one vector. Titles, summaries and sections are useful starting boundaries. Split oversized sections to fit the model's token limit, retaining enough context to identify what each chunk describes.
For text without useful boundaries, overlapping token windows are another option. Tune chunk size and overlap against representative questions rather than assuming every document needs the same split.
Each chunk points to its parent article. After reranking, one simple aggregation rule is to keep the best-scoring chunk per article. This avoids adding up many weak matches merely because an article is long. It also means 30 retrieved chunks may produce fewer than 30 distinct articles.
Chunk-type weights are a further heuristic to test. For example, using illustrative nonnegative similarity scores, a title weight of 1.0 and paragraph weight of 0.7 gives:
```text
Article A: Reset Multi-Factor Authentication
title = 0.78; paragraph = 0.74
weighted maximum = max(0.78 × 1.0, 0.74 × 0.7) = 0.78
Article B: Account Security Best Practices
title = 0.70; paragraph = 0.82
weighted maximum = max(0.70 × 1.0, 0.82 × 0.7) = 0.70
```
Without weighting, B wins with 0.82 against A's 0.78. With these weights, A wins with 0.78 against B's 0.70. This constructed example shows how the heuristic can change the order; it does not establish that the new order is better for real queries. A paragraph discount cannot guarantee that every title match wins. If applying weights to reranker outputs, account for their scale: multiplying a negative score by 0.7 increases it rather than penalizing it.
## Keep ingestion out of the search request
For bulk imports or slow embedding work, an ingestion endpoint can validate and durably enqueue an update, then return `202 Accepted` with a tracking ID. A worker chunks, embeds and stores it separately from search traffic.
Prepare replacement embeddings before removing the current ones. Replace an article's chunks in a transaction, scoped by tenant and article ID, so readers see either the old set or the new set. Give updates versions and make retries idempotent; an older job finishing late must not overwrite newer content.
A FIFO queue can preserve message order within a group, but that is only one part of processing order. Worker writes still need retry handling and version checks. Expose ingestion status so an accepted update is not mistaken for an already-searchable article. [SQS FIFO ordering](https://docs.aws.amazon.com/AWSSimpleQueueService/latest/SQSDeveloperGuide/FIFO-queues-understanding-logic.html)
## Cache results with an explicit freshness policy
A result cache avoids retrieval and reranking for repeated searches. Query-embedding caching is a separate option: it can save embedding work when the same query is reused with different filters. Stored document vectors do not eliminate query-embedding work.
A result-cache key must include everything that changes the answer, including the tenant, language, filters, access scope and model/index version. For example:
```text
search:{tenant}:{generation}:{model_version}:{lang}:{access_hash}:{filter_hash}:{query_hash}
```
Hash a canonical representation of the actual search inputs. Do not lowercase an identifier-sensitive query only for caching while sending its original case to retrieval.
Redis `DEL` accepts literal keys. `DEL search:{tenant}:*` does not expand the wildcard. One invalidation approach is to increment a tenant generation after an index update and use that generation in subsequent cache keys. Old entries expire through a TTL. Another is to iterate with `SCAN MATCH` and delete the returned keys explicitly. Neither approach makes a database write and a Redis update atomic: handle invalidation failures, and avoid caching an in-flight result under a newer generation than the one it searched. [Redis DEL](https://redis.io/docs/latest/commands/del/), [SCAN](https://redis.io/docs/latest/commands/scan/)
Choose the TTL from the allowed staleness. Permission changes may need stronger handling than ordinary article edits; stale cached results must not bypass current access checks.
## Measure before splitting services
Start with a deployment you can operate. Isolate ingestion work from interactive searches when it competes for the same resources. Split embedding and reranking into independently scaled services when measurements show that they need different capacity or release schedules.
Candidate count, text length, batching and concurrency all affect reranker cost. Record throughput and end-to-end p50, p95 and p99 latency under load before choosing a service layout.
Set a latency budget for the full request, including network and orchestration overhead. Measure stage durations to locate bottlenecks, but use the full request distribution to check the budget: adding stage percentiles does not produce an end-to-end percentile.
## Evaluate with questions from the knowledge base
Build a labeled set of queries and relevant article IDs. Include paraphrases, identifiers, supported languages, access restrictions and queries with no relevant answer. Keep a held-out set when tuning models, chunk sizes or weights.
Track retrieval recall at the candidate cutoff, final MRR or nDCG, end-to-end latency and freshness after updates. These measurements overlap: changing chunking or retrieval can change both the candidate set and its final ranking.
When a query fails, inspect its trace. If the relevant article never entered the candidate set, check ingestion, chunking, filters and retrieval. If it arrived but ranked poorly, inspect reranker scores and article aggregation first. Keep the failing query as a regression example so the next change can be judged against it.
---
### cloning-windows-drive-from-mac-os-x-using-dd-disk-destroyer.md
I decided to upgrade my Windows drive on my dual-boot Hackintosh. Here is how I did it from macOS using `dd`.
> **Updated 2026-09-13:** `dd` makes a raw disk image, not an ISO installer image. The commands below can irreversibly overwrite a disk. Confirm every identifier with `diskutil list`, unmount the whole disk before copying, and replace the placeholders only after checking them.
Open your terminal. Run `diskutil list` to get the disk identifier you want to migrate.
```sh
diskutil list
```
In my case the Windows drive is `/dev/disk1`.
Unmount that disk, then clone it with `dd`. The `r` in `/dev/rdisk1` selects macOS's raw device, which can improve copying throughput. Save the output as a `.img` file on a different physical disk from the source, with enough free space. This can take hours.
```
diskutil unmountDisk /dev/disk1
sudo dd if=/dev/rdisk1 of=/Users/mitzuuuu/Desktop/windows-drive.img bs=4m
shasum -a 256 /Users/mitzuuuu/Desktop/windows-drive.img
```
Install the empty drive and run `diskutil list` again to get its identifier. Do not assume it will be the same identifier as a previous drive. Its capacity must be at least as large as the source image.
Unmount the destination disk, then write the image. This operation can also take hours.
```
diskutil unmountDisk /dev/disk0
sudo dd if=/Users/mitzuuuu/Desktop/windows-drive.img of=/dev/rdisk0 bs=4m
```
`of=` is the destination. A wrong value overwrites that disk. The checksum records the image you created; keep it with the image so you can check the file before a later restore.
After migration is done, take care of the unallocated space in Windows Disk Management. You can extend the Windows volume only when the unallocated space is adjacent to it and the partition layout permits it.
---
### governance-worker-synthesis-assembly-reconstruction.md
My coding agents previously kept planning, worker results, and synthesis in one orchestrator conversation. On a multi-file refactor, three worker results accumulated there before the final response. It was difficult to inspect the handoffs or give synthesis a focused input.
That is a constraint of this workflow, not a verdict on every orchestrator design. A coordinator can still be useful for planning and recovery. I changed where detailed worker output lives and how synthesis starts.
## The three-stage workflow
I use three stages backed by filesystem state: governance, a variable number of workers, and synthesis.
```text
User → Governance (plans, writes task specs to .agent-state/tasks/*.yaml)
│
│ spawns workers with: "Read task spec. Write result to file. Confirm."
▼
┌──────────┐ ┌──────────┐ ┌──────────┐
│ Worker 1 │ │ Worker 2 │ │ Worker N │ ← fresh contexts
└────┬─────┘ └────┬─────┘ └────┬─────┘
│ │ │
▼ ▼ ▼
.agent-state/results/*.yaml
│
▼
Synthesis agent (fresh context, reads result files, produces final answer)
```
I configure governance to plan, write task specifications, and delegate rather than perform the assigned unit of work or synthesize the final response. Each worker receives a task-spec path and result path. Workers write structured results to YAML and return a short confirmation. When the fanout finishes, a fresh synthesis agent reads the result files and produces the final response. This separation is a workflow convention; it needs tool permissions if governance must be technically prevented from editing project files.
An illustrative task specification:
```yaml
# .agent-state/tasks/analyze-auth.yaml
goal: audit the authentication module for security issues
constraints: do not modify the database schema
expected_output_path: .agent-state/results/analyze-auth.yaml
context_files: [src/auth/middleware.ts, src/auth/session.ts]
blocked_on: null
```
An illustrative result schema:
```yaml
# .agent-state/results/analyze-auth.yaml
status: ok
summary: example findings from a security review
findings:
- severity: critical
summary: example review finding
files_changed: []
blockers: []
verification_gaps:
- could not verify third-party OAuth callback flow end-to-end
```
The plugin I wrote, replacing the old orchestrator-minion watchdog, adds two capabilities beyond inactivity detection:
1. **Fanout completion tracking**: when all workers for a fanout are done, the plugin nudges governance to start synthesis.
2. **Path-aware recovery**: when a worker stalls, the recovery prompt includes the task-spec and expected-result paths, so governance can inspect the state before deciding whether to wait, re-brief, or report a blocker.
```text
A watched worker may be inactive.
Task spec: .agent-state/tasks/analyze-auth.yaml
Expected result: .agent-state/results/analyze-auth.yaml
Inspect the child session, then decide: wait, re-brief, or report a blocker.
```
## What the workflow changes
For a multi-file refactor, the intended differences are:
| | Before | After |
|---|---|---|
| Governance context | Detailed worker results in the same conversation | Worker confirmations and paths |
| Handoff format | Natural-language summaries | Structured YAML on disk |
| Synthesis context | Same orchestrator conversation | Fresh context reading result files |
| Stale worker recovery | Session-only prompt | Task-spec and result paths included |
The synthesis stage receives finished result files rather than governance discussion, worker chatter, and recovery prompts. That makes its input easier to inspect and reproduce. The post does not provide a controlled before-and-after quality study, so this is a workflow design benefit rather than a measured quality result.
## Research that informed the design
**[ExtAgents](https://arxiv.org/abs/2505.21471)** found benefits from distributing external knowledge across agents for its multi-hop question-answering and long-survey tasks. That supports testing parallel work when inputs are independent; it does not establish the same result for coding tasks.
**[ReAcTree](https://arxiv.org/abs/2511.02424)** reports 61% goal success versus 31% for ReAct on WAH-NL with Qwen 2.5 72B. Its task-tree approach is useful when subgoals and dependencies are explicit.
**[The Organizational Behavior of Agentic AI](https://arxiv.org/abs/2606.30986)** finds that human-imitation organization forms often underperform shared-state or adaptive forms under its tested interface conditions. I take that as a reason to make handoffs inspectable, not as a universal architecture rule.
## What still needs work
**Elastic context (ACE).** [ACE](https://arxiv.org/abs/2606.31564) describes adaptive compression for message history. I have not implemented it. If governance itself grows during a large fanout, I would evaluate it against task-specific retrieval and summaries rather than assume one compression strategy is lossless.
**Dependency-aware fanout.** Right now, fanout assumes all workers are fully independent. If task B needs task A's output, governance must serialize them manually. ReAcTree's dynamic tree construction could automate this.
**Structured handoff standardization.** The YAML schemas I use are project-specific. A small vocabulary such as `status`, `findings`, `files_changed`, `blockers`, and `verification_gaps` is a useful starting point, but projects still need fields that match their tools and review process.
---
### how-i-grew-my-twitter-followers-from-500-to-1000-in-just-12-days.md

> Twitter can sometimes can make you feel like you’re tweeting to a lonesome abyss.
Before we dive into the How To, let me tell you that I’m not a social media marketing expert. I’m a software engineer and #socialmedia doesn’t come natural to me 😅.
My twitter followers have always stagnated at around 300–400. This is mostly because I was just consuming information and didn’t spend time sharing __relevant tweets__ and __building an audience__.
Recently I’ve decided to do an experiment and see how far I can take my Twitter account. So let’s get down to it 🧐
My Twitter followers before doing this experiment: __435__
After doing some research I made a plan:
1. Setup profile bio, be authenthic, write what your passionate about.
2. Add a profile photo.. nobody wants to follow an “egghead” 😒
3. Identify my audience. My audience revolves around #swift #objectivec #javascript #graphql #reactjs #nodejs 👍🏻. Use tools such as [hashtagify.me](https://hashtagify.me/) to research what hashtags to use.
4. Engage audience with relevant tweets. Be consistent! (post 3–6 times a day). Tweeting/retweeting too much will hurt your profile.
5. Follow and engage with __active__ people with the same interests as yourself. Search through relevant hasthtags (eg.: #technology) and __engage with the people that actively like and retweet other people’s posts__.
6. Engage in Twitter chats. This can lead to massive exposure.
7. PRO TIP: pin your most engaging tweets to your twitter profile. Use [Twitter Analytics](https://analytics.twitter.com/) to find your most popular tweets.
In order to tweet to my twitter audience I’ve setup a workflow using the following tools: [Buffer](https://buffer.com/), [Feedly](https://feedly.com/) and [Zapier](https://zapier.com/).
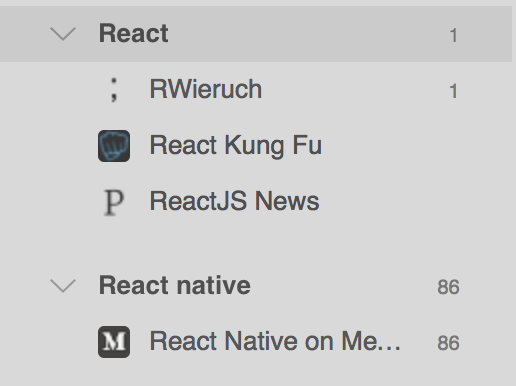
1. [Feedly](https://feedly.com/) let’s you find and subscribe to quality publications. Also can easily be plugged into services such as [Zapier](https://zapier.com/) or [IFTTT](https://ifttt.com/).
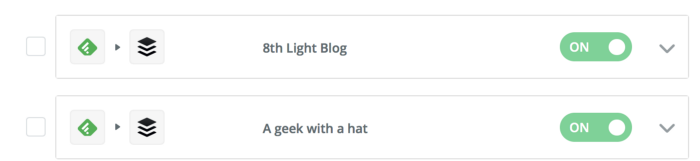
2. [Zapier](https://zapier.com/) allows you to create jobs which check if a new article was published into a Feedly category and then automatically add it to my Buffer social media queue.
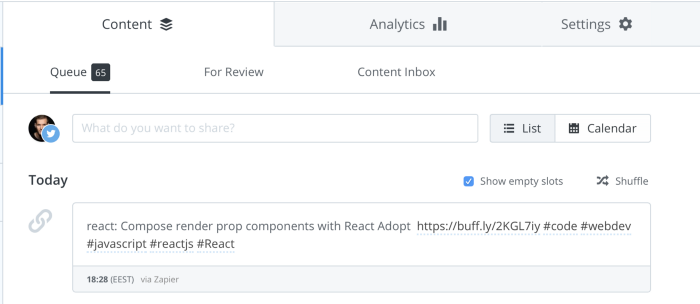
3. [Buffer](https://buffer.com/) is the last piece of the puzzle. The service schedules content to be sent out to my social media profile. TIP: Make sure to keep that queue filled and review it once every couple of days. __Add hashtags, mention authors for extra engagment__ 👌
One takaway is that consitency is key… Building an audience takes time. Treat your Twitter profile like you were running a marathon, not a sprint.
Let me know if you have any other tips for growing your social media presence 🙏🏻
See you on [Twitter](https://x.com/MihaiSerban)
Happy *#GrowthHacking*!
---
### how-to-fix-broken-images-in-react.md

In one of my recent projects we encountered many images which were missing from our S3 bucket. When I see something like this it just makes me sick 😫.
`![]() ` provides us with two events, `onLoad` and `onError`. We can use these two to keep track of the status of the image.
`onError` is called when our image has failed to load, and we can set `src` to our preferred fallback image.
`onLoad` is called when our image loaded successfully, nothing for us to do here.
```
import React, { useEffect, useState } from "react";
function Image({
src = "",
placeholder = "",
disableContextMenu = false,
onError,
onContextMenu,
...other
}) {
const [imageSrc, setImageSrc] = useState(src);
useEffect(() => {
setImageSrc(src);
}, [src]);
function handleImageError(event) {
if (placeholder && imageSrc !== placeholder) {
setImageSrc(placeholder);
}
onError?.(event);
}
function handleContextMenu(event) {
onContextMenu?.(event);
if (disableContextMenu) {
event.preventDefault();
}
}
return (
` provides us with two events, `onLoad` and `onError`. We can use these two to keep track of the status of the image.
`onError` is called when our image has failed to load, and we can set `src` to our preferred fallback image.
`onLoad` is called when our image loaded successfully, nothing for us to do here.
```
import React, { useEffect, useState } from "react";
function Image({
src = "",
placeholder = "",
disableContextMenu = false,
onError,
onContextMenu,
...other
}) {
const [imageSrc, setImageSrc] = useState(src);
useEffect(() => {
setImageSrc(src);
}, [src]);
function handleImageError(event) {
if (placeholder && imageSrc !== placeholder) {
setImageSrc(placeholder);
}
onError?.(event);
}
function handleContextMenu(event) {
onContextMenu?.(event);
if (disableContextMenu) {
event.preventDefault();
}
}
return (
 );
}
export default Image;
```
The [original 2018 version is also available as a Gist](https://gist.github.com/mihaiserban/751a84df361178db387e130d0c07693e).
> **Updated 2026-09-13:** The original example used `componentWillReceiveProps`, which is legacy React API. This version resets the image when `src` changes with an effect, and only attempts the fallback once.
---
### how-to-handle-aws-ses-bounces-and-complaints.md
If you’re thinking of implementing AWS Simple Email Service for your product, you might find out that you need a flow to handle email bounces and complaints before AWS approves your service quota increase and take your SES account out of sandbox mode.
> **Updated 2026-09-13:** This guide reflects the 2018 SNS identity-notification workflow. Current SES can also publish events through configuration sets. Notification settings are scoped to the SES Region and sending identity, so confirm both before using the console steps below. Production access still requires a process for handling bounces and complaints.
This requirement assures SES maintains a high reputation for only delivering mail people want and thereby maintaining a high deliverability for legitimate mail.
What exactly are email bounces and complaints?
**Bounce** email happens when an is returned to the sender because it cannot be delivered for some reason.
**Complaints** are reports made by email recipients against emails they don’t want in their inbox. Mark as SPAM for example triggers such a report. Email Service Providers (ESPs), have what is called a “feedback loop” with all of the major Internet Service Provides (ISPs).
In case your API receives a Bounce/Complaint you should take steps to make sure it doesn’t happen again. Easiest way is to not send emails to that user, unless he agrees to receive it.
#### Overview of the sending process
The following figure shows the process of sending an email via [AWS SES](http://aws.amazon.com/ses/).
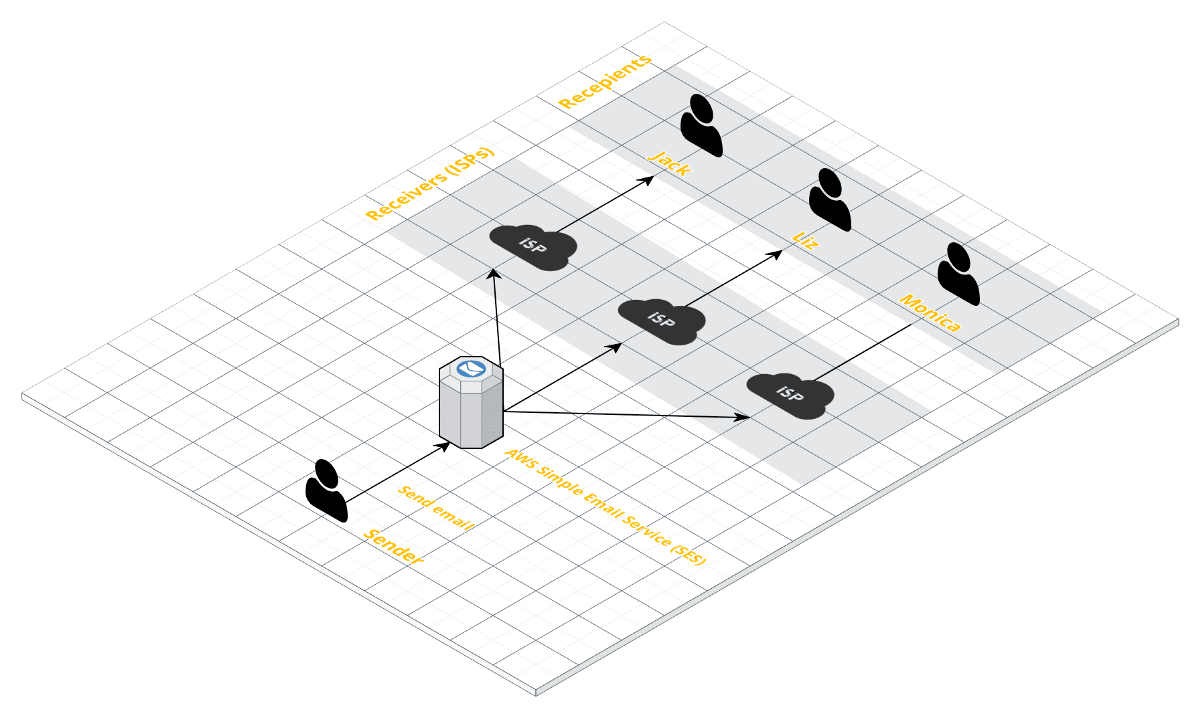
If the sender request to SES succeds then it can expect one of the following outcomes:
* **success**
* **bounce**
* **complaint**
#### Overview of handling of bounce/complaints
The following figure shows the process of handling bounce/complaints by using [AWS SNS](https://aws.amazon.com/sns) service.
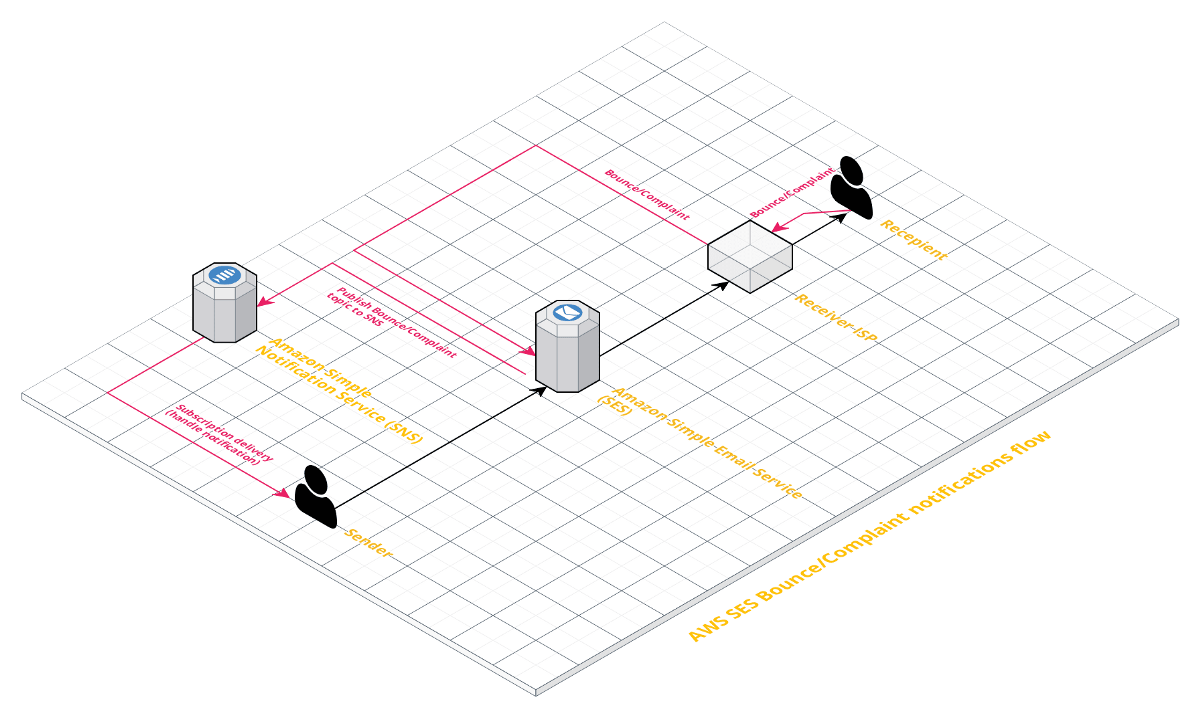
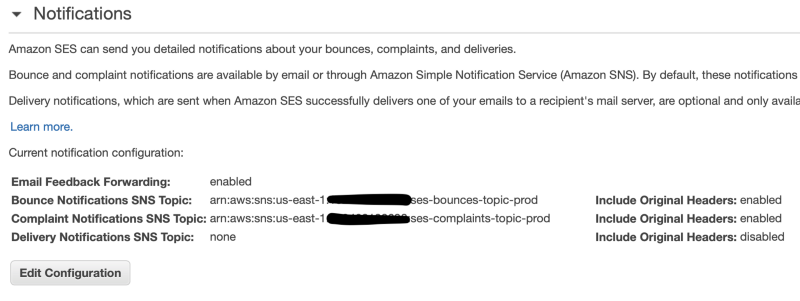
Bounce and complaint notifications are available by email or through Amazon Simple Notification Service (Amazon SNS). By default, these notifications are sent to you via email by a feature called _email feedback forwarding_.
#### 1. Setup AWS SNS topics for bounce and complaints
Create the following topics in [AWS SNS](https://docs.aws.amazon.com/sns/latest/dg/sns-http-https-endpoint-as-subscriber.html#SendMessageToHttp.prepare):
* ses-bounces-topic-prod
* ses-complaints-topic-prod
* ses-deliveries-topic-prod (optional)
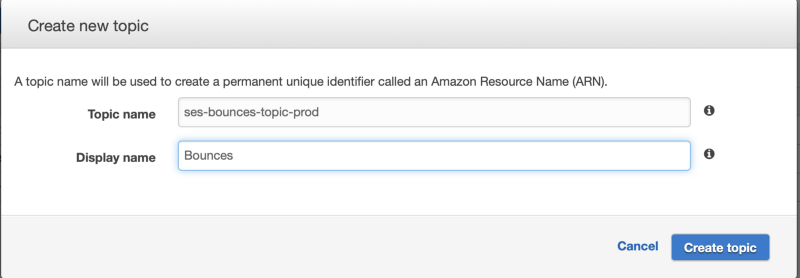
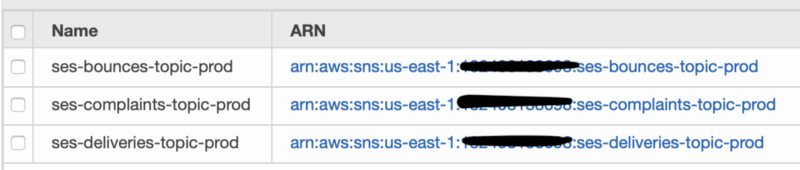
After creating each topic, you’ll receive a identity id is called **ARN,** which we need in the next step of creating a SNS subscription.
Head to **SNS Subscriptions** and create a SNS subscription for the bounce and complaint topics you’ve previously created.
This is where we need to specify a Endpoint where we’ll receive notifications from each topic. Endpoint must be a **POST** method on your backend.
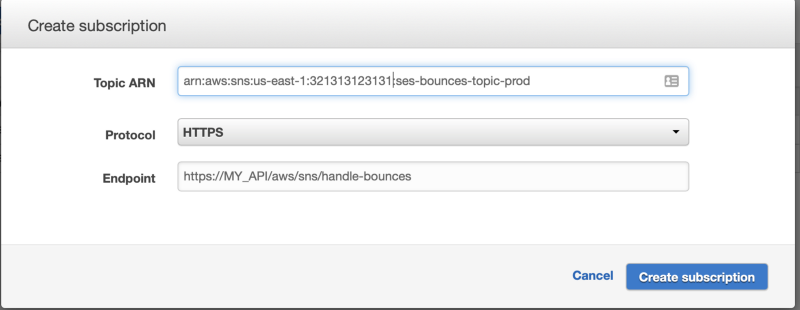
Each Subscription needs to be confirmed, after creation they are in a **PendingConfirmation** state.
To confirm our subscription, we need to implement the endpoints in our backend, and call Request confirmations from the SNS dashboard.
In the body received on our server we’ll find the SubscribeURL or Token which we can use to confirm.
Call sns.confirmSubscription() with the Token or copy pasting SubscribeURL into SNS Dashboard.
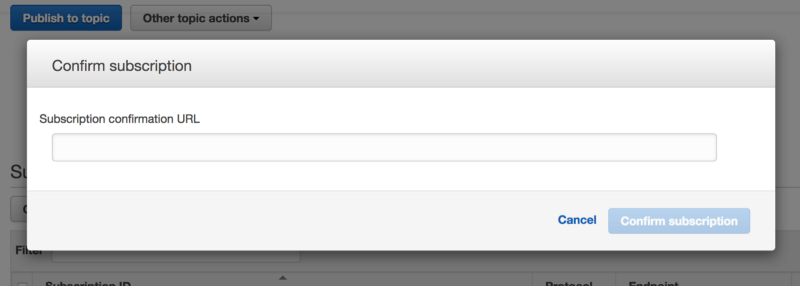
> **I’ve provided the code to subscribe and confirm each endpoint on** [**Github**](https://gist.github.com/mihaiserban/8a03fd28e54cac8856dbdfebd95bd7b3)**.**
> **TIP: Make sure your IAM User has access to SNS**
#### 2. Configure SES to publish notifications to each created SNS topic
In the 2018 SES console, go to **Email Addresses**, select the sending identity, open **Notifications**, and select the SNS topic for each notification type. In the current console, use the matching identity notification settings, or a configuration set when you need event publishing for a specific sending flow.
#### 3. Testing using [AWS Mailbox Simulator](https://aws.amazon.com/blogs/aws/mailbox-simulator-for-the-amazon-simple-email-service/)
The AWS mailbox simulator can be found in SES Managment Console and provides a way to test the way your implementation handles scenarios like bounces and complaints.
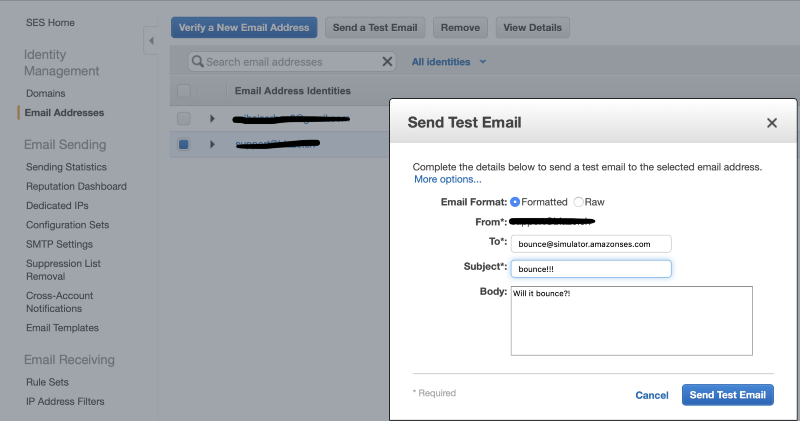
Mail sent to **success@simulator.amazonses.com** will be treated as delivered successfully.
Mail sent to **bounce@simulator.amazonses.com** will be rejected with an SMTP 550 (“Unknown User”) response code. Amazon SES will send you a bounce notification by email or by SNS notification.
Mail sent to **ooto@simulator.amazonses.com** will be treated as delivered successfully.
Mail sent to **complaint@simulator.amazonses.com** will simulate the case in which the recipient clicks **Mark as Spam** within their email application and the ISP sends a complaint response to Amazon SES.
Mail sent to **suppressionlist@simulator.amazonses.com** simulates a hard bounce as though the recipient were on the Amazon SES global suppression list.
---
### javascript-es6-cheatsheet-arrow-functions.md
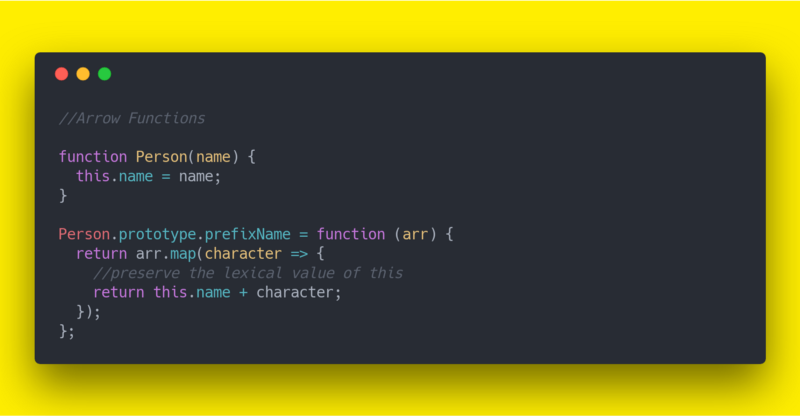
Arrows are a function shorthand using the `=>` syntax. Arrow functions allow you to preserve the lexical value of `this`.
Take the example below where we have a nested function, in which we would like to preserve the context of `this` from its lexical scope:
```
function Person(name) {
this.name = name;
}
Person.prototype.prefixName = function (arr) {
return arr.map(function (character) {
return this.name + character; // Cannot read property 'name' of undefined
});
};
```
Using Arrow Functions, the lexical value of `this` isn't shadowed and we can re-write the above as shown:
```
function Person(name) {
this.name = name;
}
Person.prototype.prefixName = function (arr) {
return arr.map(character => this.name + character);
};
```
If an arrow is inside another function, it shares the `arguments` variable of its parent function. Example:
```
// Lexical arguments
function square() {
let example = () => {
let numbers = [];
for (let number of arguments) {
numbers.push(number * number);
}
return numbers;
};
return example();
}
square(2, 4, 7.5, 8, 11.5, 21); // returns: [4, 16, 56.25, 64, 132.25, 441]
```
You can find a more complete ES6 cheetsheet on my [Github](https://github.com/mihaiserban/es6-cheetsheet/blob/master/README.md) page.
---
### javascript-es6-cheatsheet-async-await.md
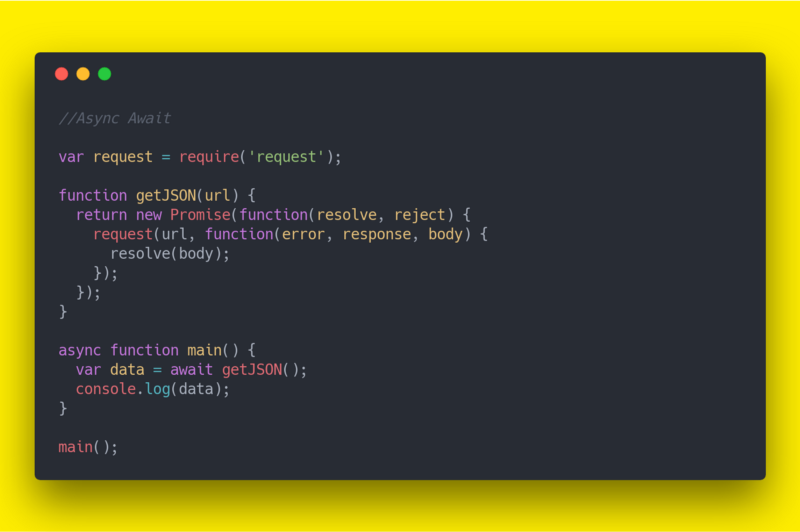
* Async/await was standardized in ES2017. Previous options for asynchronous code are callbacks and promises.
* Async/await is built on top of promises. It cannot be used with plain callbacks or node callbacks.
* Async/await makes asynchronous code look and behave a little more like synchronous code.
In a regular script, `await` may only be used in functions marked with the `async` keyword. ECMAScript modules can also use top-level `await`. It suspends execution in its context until the promise settles. If the awaited expression isn’t a promise, it is converted to one.
`async await` allows us to perform the same thing we accomplished using Generators and Promises with less effort:
```
async function getJSON(url) {
const response = await fetch(url);
if (!response.ok) {
throw new Error(`Request failed: ${response.status}`);
}
return response.json();
}
async function main() {
try {
const data = await getJSON('https://api.example.com/data');
console.log(data);
} catch (error) {
console.error(error);
}
}
main();
```
Under the hood, it performs similarly to [Generators](https://medium.com/@serbanmihai/javascript-es6-cheatsheet-generators-997cc977f7f1).
> **Updated 2026-09-13:** The original callback wrapper depended on the now-deprecated `request` package, ignored errors, and called `getJSON` without a URL. The example now uses `fetch`, available in modern browsers and Node.js 18+.
---
### javascript-es6-cheatsheet-classes.md
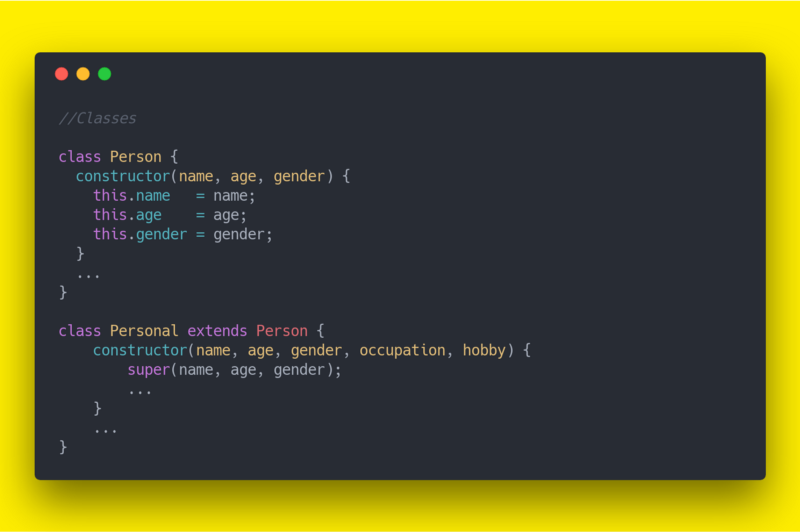
Prior to ES6, we implemented Classes by creating a constructor function and adding properties by extending the prototype:
```
function Person(name, age, gender) {
this.name = name;
this.age = age;
this.gender = gender;
}
Person.prototype.incrementAge = function () {
return this.age += 1;
};
```
And created extended classes by the following:
```
function Personal(name, age, gender, occupation, hobby) {
Person.call(this, name, age, gender);
this.occupation = occupation;
this.hobby = hobby;
}
Personal.prototype = Object.create(Person.prototype);
Personal.prototype.constructor = Personal;
Personal.prototype.incrementAge = function () {
Person.prototype.incrementAge.call(this);
this.age += 20;
console.log(this.age);
};
```
ES6 classes are a simple sugar over the prototype-based OO pattern. Classes support prototype-based inheritance, super calls, instance and static methods and constructors:
```
class Person {
constructor(name, age, gender) {
this.name = name;
this.age = age;
this.gender = gender;
}
incrementAge() {
this.age += 1;
}
}
```
And extend them using the `extends` keyword:
```
class Personal extends Person {
constructor(name, age, gender, occupation, hobby) {
super(name, age, gender);
this.occupation = occupation;
this.hobby = hobby;
}
incrementAge() {
super.incrementAge();
this.age += 20;
console.log(this.age);
}
}
```
You can find a more complete ES6 cheetsheet on my [Github](https://github.com/mihaiserban/es6-cheetsheet/blob/master/README.md) page.
---
### javascript-es6-cheatsheet-destructuring.md
### Destructuring
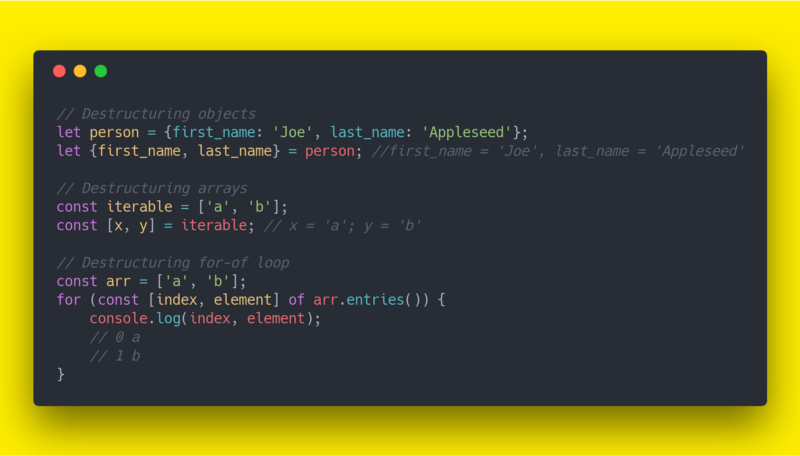
Destructuring is a convenient way of extracting multiple values from data stored in (possibly nested) objects and Arrays.
### Array
Destructuring assignment allows you to assign the properties of an array using syntax that looks similar to array literals.
Old way:
```
var first = someArray[0];
var second = someArray[1];
var third = someArray[2];
```
New way:
```
let [first, second, third] = someArray;
```
If you want to declare your variables at the same time, you can add a `var`, `let`, or `const` in front of the assignment.
```
var [ variable1, variable2, ..., variableN ] = array;
let [ variable1, variable2, ..., variableN ] = array;
const [ variable1, variable2, ..., variableN ] = array;
```
We can even skip a few variables:
```
let [,,third] = ["foo", "bar", "baz"];
console.log(third); // "baz"
```
There’s also no need to match the full array:
```
let array = [1, 2, 3, 4];
let [a, b, c] = array;
console.log(a, b, c) // -------- 1 2 3
```
You can capture all trailing items in an array with a “rest” pattern:
```
const array = [1, 2, 3, 4];
const [head, ...tail] = array;
console.log(head); // 1
console.log(tail); // [2, 3, 4]
```
Rest parameter must be applied as the last element, otherwise you’ll get a `SyntaxError`.
```
let array = [1, 2, 3, 4];
let [...head, d] = array;
// Uncaught SyntaxError: Unexpected token...
```
### Object
Old way of destructuring an object:
```
var person = { first_name: 'Joe', last_name: 'Appleseed' };
var first_name = person.first_name; // 'Joe'
var last_name = person.last_name; // 'Appleseed'
```
New way of destructuring an object:
```
let person = { first_name: 'Joe', last_name: 'Appleseed' };
let {first_name, last_name} = person;
console.log(first_name); // 'Joe'
console.log(last_name); // 'Appleseed'
```
When you destructure on properties that are not defined, you get undefined:
```
let { missing } = {};
console.log(missing); // undefined
```
You can also destructure in a for-of loop:
```
const arr = ['a', 'b'];
for (const [index, element] of arr.entries()) {
console.log(index, element);
}
// Output:
// 0 a
// 1 b
```
Object rest properties were standardized in ES2018. If you support older runtimes, transpile this syntax.
```
let object = {
a: 'A',
b: 'B',
c: 'C',
d: 'D',
}
const { a, b, ...other } = object;
console.log(other); // {c: 'C', d: 'D'}
```
---
### javascript-es6-cheatsheet-generators.md
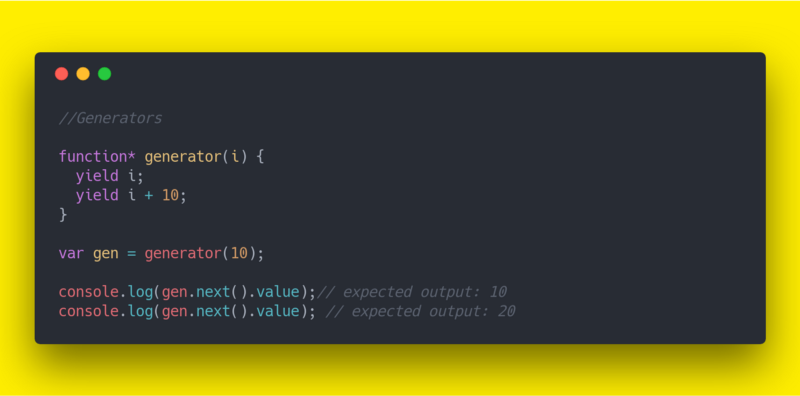
A `generator` is a function which can be exited and later re-entered. Their context (variable bindings) will be saved across re-entrances.
Generators in JavaScript are a very powerful tool for asynchronous programming as they mitigate the problems with callbacks, such as `Callback Hell` and `Inversion of Control`.
This pattern is what `async` functions are built on top of.
For creating a generator function, we use `function *` syntax instead of just `function`.
Calling a generator function does not execute its body immediately; an iterator object for the function is returned instead. When the iterator’s `next()` method is called, the generator function's body is executed until the first `yield` expression, which specifies the value to be returned from the iterator or, with `yield*`, delegates to another generator function.
The `next()` method returns an object with a value property containing the yielded value and a done property which indicates whether the generator has yielded its last value as a boolean. Calling the `next()` method with an argument will resume the generator function execution, replacing the yield expression where execution was paused with the argument from `next()`.
**Simple example:**
```
function* generator(i) {
yield i;
yield i + 10;
}
var gen = generator(10);
console.log(gen.next().value);// expected output: 10
console.log(gen.next().value); // expected output: 20
```
**Example with yield\*:**
```
function* anotherGenerator(i) {
yield i + 1;
yield i + 2;
yield i + 3;
}
function* generator(i) {
yield i;
yield* anotherGenerator(i);
yield i + 10;
}
var gen = generator(10);
console.log(gen.next().value); // 10
console.log(gen.next().value); // 11
console.log(gen.next().value); // 12
console.log(gen.next().value); // 13
console.log(gen.next().value); // 20
```
**Infinite Data generator example:**
```
function * naturalNumbers() {
let num = 1;
while (true) {
yield num;
num = num + 1
}
}
const numbers = naturalNumbers();
console.log(numbers.next().value) // 1
console.log(numbers.next().value) // 2
```
You can find a more complete ES6 cheetsheet on my [Github](https://github.com/mihaiserban/es6-cheetsheet/blob/master/README.md) page.
---
### javascript-es6-cheatsheet-getter-and-setter-functions.md
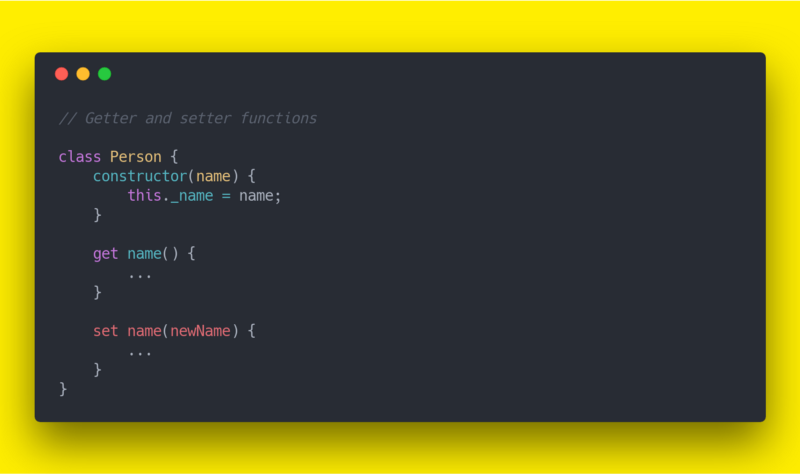
ES6 has started supporting getter and setter functions within classes. Using the following example:
```
class Person {
constructor(name) {
this._name = name;
}
get name() {
if(this._name) {
return this._name.toUpperCase();
} else {
return undefined;
}
}
set name(newName) {
if (newName == this._name) {
console.log('I already have this name.');
} else if (newName) {
this._name = newName;
} else {
return false;
}
}
}
let person = new Person("John Doe");
// uses the get method in the background
if (person.name) {
console.log(person.name); // JOHN DOE
}
// uses the setter in the background
person.name = "Jane Doe";
console.log(person.name); // JANE DOE
```
---
### javascript-es6-cheatsheet-helpful-array-functions.md
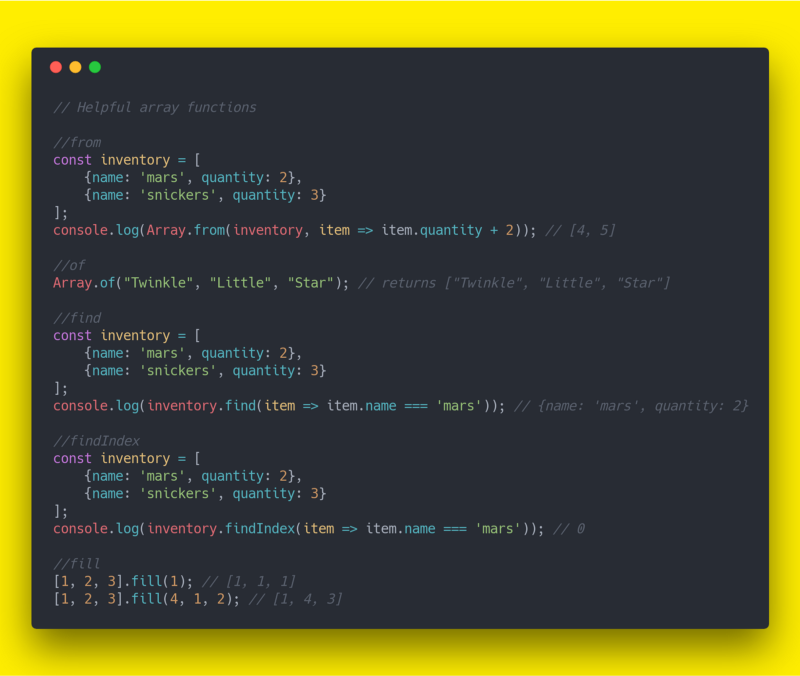
`**from**`
```
const inventory = [
{name: 'mars', quantity: 2},
{name: 'snickers', quantity: 3}
];
console.log(Array.from(inventory, item => item.quantity + 2)); // [4, 5]
```
`**of**`
```
Array.of("Twinkle", "Little", "Star"); // returns ["Twinkle", "Little", "Star"]
```
`**find**`
```
const inventory = [
{name: 'mars', quantity: 2},
{name: 'snickers', quantity: 3}
];
console.log(inventory.find(item => item.name === 'mars')); // {name: 'mars', quantity: 2}
```
`**findIndex**`
```
const inventory = [
{name: 'mars', quantity: 2},
{name: 'snickers', quantity: 3}
];
console.log(inventory.findIndex(item => item.name === 'mars')); // 0
```
`**fill**` method takes up to three arguments value, start and end. The start and end arguments are optional with default values of 0 and the length of the this object.
```
[1, 2, 3].fill(1); // [1, 1, 1]
[1, 2, 3].fill(4, 1, 2); // [1, 4, 3]
```
You can find a more complete ES6 cheetsheet on my [Github](https://github.com/mihaiserban/es6-cheetsheet/blob/master/README.md) page.
---
### javascript-es6-cheatsheet-helpful-string-functions.md
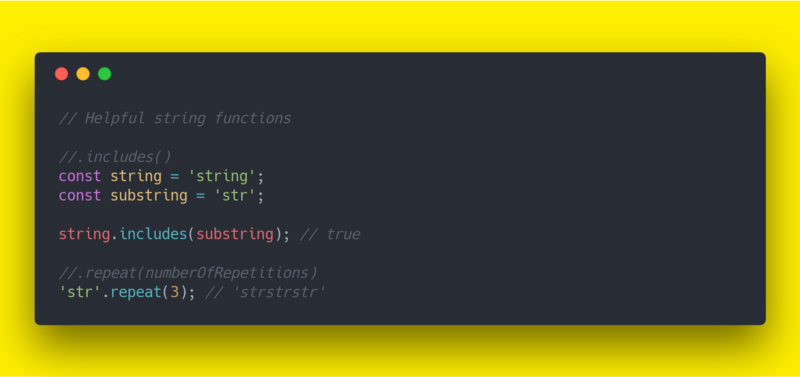
### .includes( )
```
var string = 'string';
var substring = 'str';
console.log(string.indexOf(substring) > -1);
```
Instead of checking for a return value `> -1` to denote string containment, we can simply use `.includes()` which will return a boolean:
```
const string = 'string';
const substring = 'str';
console.log(string.includes(substring)); // true
```
### .repeat( )
```
function repeat(string, count) {
var strings = [];
while(strings.length < count) {
strings.push(string);
}
return strings.join('');
}
```
In ES6, we now have access to a nicer implementation:
```
// String.repeat(numberOfRepetitions)
'str'.repeat(3); // 'strstrstr'
```
You can find a more complete ES6 cheetsheet on my [Github](https://github.com/mihaiserban/es6-cheetsheet/blob/master/README.md) page.
---
### javascript-es6-cheatsheet-map-weakmap.md
### Map
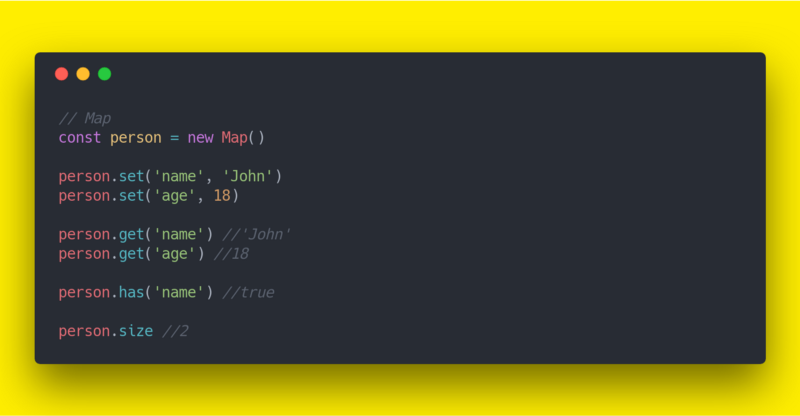
A `Map` is a data structure allows to associate data to a key.
Before it’s intruduction in ES6, people generally used objects as maps, by associating some object or value to a specific key value:
```
const person = {}
person.name = 'John'
person.age = 18
console.log(person.name) //John
console.log(person.age) //18
```
`Map` example:
```
const person = new Map()
person.set('name', 'John')
person.set('age', 18)
const name = person.get('name')
const age = person.get('age')
console.log(name) //John
console.log(age) //18
```
The `Map` also provide us with methods to help us manage the data.
`delete()` method - deletes an item from a map by key:
```
person.delete('name')
```
`clear()` method - delete all items from a map:
```
person.clear()
```
`has()` method - check if a map contains an item by key:
```
const hasName = person.has('name')
```
`size()` method - check the number of items in a map:
```
const size = person.size
```
We can also use a couple of methods to iterate:
`entries()` returns all entries.
`keys()` returns all keys.
`values()` returns all values.
Find more details about `Map` [**here**](https://developer.mozilla.org/en-US/docs/Web/JavaScript/Reference/Global_Objects/Map)
### WeakMap
A `WeakMap` is a special kind of map.
In a `Map`, items are never garbage collected. A `WeakMap` instead lets all its items be freely garbage collected. Every key of a `WeakMap` is an object. When the reference to this object is lost, the value can be garbage collected.
Main differences between `WeakMap` and `Map`:
* you cannot iterate over the keys or values (or key-values) of a WeakMap
* you cannot clear all items from a WeakMap
* you cannot check its size
A WeakMap exposes those methods, which are equivalent to the Map ones:
```
get(k)
set(k, v)
has(k)
delete(k)
```
The use cases of a `WeakMap` are less evident than the ones of a `Map`, and you might never find the need for them, but essentially it can be used to build a memory-sensitive cache that is not going to interfere with garbage collection, or for careful encapsualtion and information hiding.
Find more details about `WeakMap` [**here**](https://developer.mozilla.org/en-US/docs/Web/JavaScript/Reference/Global_Objects/WeakMap).
You can find a more complete ES6 cheetsheet on my [Github](https://github.com/mihaiserban/es6-cheetsheet/blob/master/README.md) page.
---
### javascript-es6-cheatsheet-modules.md
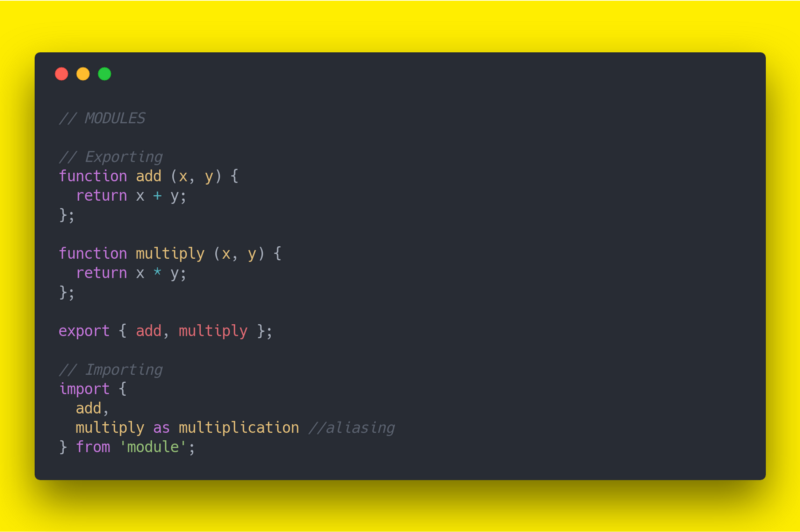
Prior to ES6, we used libraries such as [Browserify](http://browserify.org/) to create modules on the client-side, and [require](https://nodejs.org/api/modules.html#modules_module_require_id) in **Node.js**. ES modules provide a separate, standard module system built around `import` and `export`; CommonJS and AMD code need a compatible runtime, bundler, or migration layer.
### Exporting in CommonJS
```
module.exports = 1;
module.exports = { foo: 'bar' };
module.exports = ['foo', 'bar'];
module.exports = function bar () {};
```
### Exporting in ES6
**Named Exports:**
```
export function multiply (x, y) {
return x * y;
};
```
As well as **exporting a list** of objects:
```
function add (x, y) {
return x + y;
};
function multiply (x, y) {
return x * y;
};
export { add, multiply };
```
**Default export:**
In our module, we can have many named exports, but we can also have a default export. It’s because our module could be a large library and with default export we can import then an entire module.
Important to note that there’s only `one default export per module`.
```
export default function (x, y) {
return x * y;
};
```
This time we don’t have to use curly braces for importing and we have a chance to name imported statement as we wish.
```
import multiply from 'module';
// === OR ===
import whatever from 'module';
```
A module can have both named exports and a default export:
```
// module.js
export function add (x, y) {
return x + y;
};
export default function (x, y) {
return x * y;
};
// app.js
import multiply, { add } from 'module';
```
The default export is just a named export with the special name default.
```
// module.js
export default function (x, y) {
return x * y;
};
// app.js
import multiply from 'module';
```
### Importing in ES6
```
import { add } from 'module';
```
We can even import many statements:
```
import { add, multiply } from 'module';
```
Imports may also be **aliased**:
```
import {
add as addition,
multiply as multiplication
} from 'module';
```
and use wildcard (`*`) to import all exported statemets:
```
import * as module from 'module';
```
---
### javascript-es6-cheatsheet-promises.md
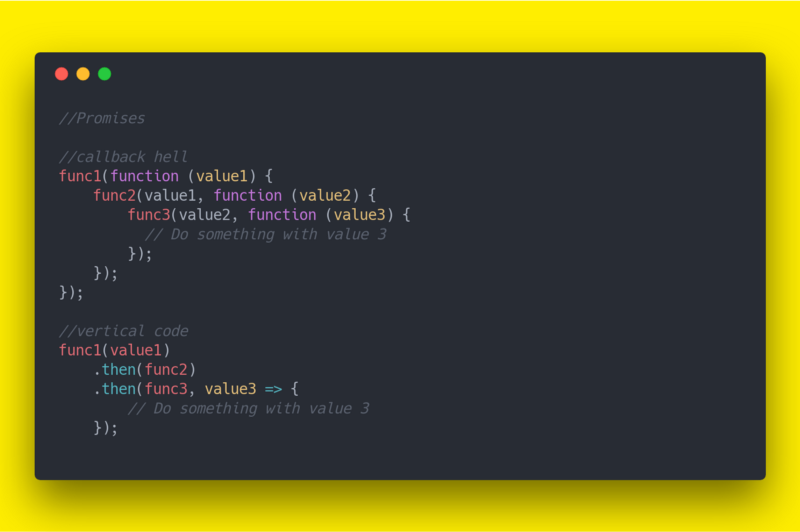
Promises are one of the most exciting additions to JavaScript ES6. Promises are a pattern that greatly simplifies asynchronous programming by making the code look synchronous and avoid problems associated with callbacks.
Prior to ES6, we used [bluebird](https://github.com/petkaantonov/bluebird) or [Q](https://github.com/kriskowal/q). Now we have Promises natively.
`A Promise is an object that is used as a placeholder for the eventual results of a deferred (and possibly asynchronous) computation.`
The `resolve` and `reject` are functions themselves and are used to send back values to the promise object.
```
const myPromise = new Promise((resolve, reject) => {
if (Math.random() * 100 <= 90) {
resolve('Hello, Promises!');
}
reject(new Error('In 10% of the cases, I fail. Miserably.'));
});
myPromise.then((resolvedValue) => {
console.log(resolvedValue); //Hello, Promises!
}, (error) => {
console.log(error); //In 10% of the cases, I fail. Miserably.
});
```
**Chaining Promises:**
Promises allow us to turn our horizontal code (callback hell):
```
func1(function (value1) {
func2(value1, function (value2) {
func3(value2, function (value3) {
// Do something with value 3
});
});
});
```
Into vertical code like so:
```
func1(value1)
.then(func2)
.then(func3)
.then(value3 => {
// Do something with value 3
})
.catch(error => {
// Handle an error from any step
});
```
**Parallelize Promises:**
We can use `Promise.all()` to handle an array of asynchronous operations.
```
let urls = [
'/api/commits',
'/api/issues/opened',
'/api/issues/assigned',
'/api/issues/completed',
'/api/issues/comments',
'/api/pullrequests'
];
let promises = urls.map((url) => {
return new Promise((resolve, reject) => {
$.ajax({ url: url })
.done((data) => {
resolve(data);
});
});
});
Promise.all(promises)
.then((results) => {
// Do something with results of all our promises
});
```
---
### javascript-es6-cheatsheet-set-weakset.md
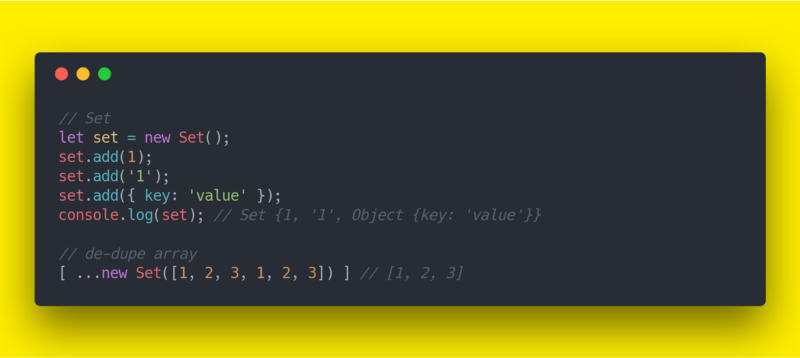
A `Set` is a collection for unique values. The values can be primitives or object references.
```
let set = new Set();
set.add(1);
set.add('1');
set.add({ key: 'value' });
console.log(set); // Set {1, '1', Object {key: 'value'}}
```
Most importantly is that it does not allow duplicate values, one good use if to remove duplicate values from an array:
```
[ ...new Set([1, 2, 3, 1, 2, 3]) ] //[1, 2, 3]
```
Iteration using built-in method forEach and for..of:
```
// forEach
let set = new Set([1, '1', { key: 'value' }]);
set.forEach(function (value) {
console.log(value);
// 1
// '1'
// Object {key: 'value'}
});
// for..of
let set = new Set([1, '1', { key: 'value' }]);
for (let value of set) {
console.log(value);
// 1
// '1'
// Object {key: 'value'}
};
```
Similar to `Map`, `Set` provides us with methods such as `has()`, `delete()`, `clear()`.
Find more details about `Set` [**here**](https://developer.mozilla.org/en-US/docs/Web/JavaScript/Reference/Global_Objects/Set)
### WeakSet
Like a `WeakMap`, `WeakSet` is a `Set` that doesn’t prevent its values from being garbage-collected. It has simpler API than `WeakMap`, because has only three methods:
```
new WeakSet([iterable])
WeakSet.prototype.add(value) : any
WeakSet.prototype.has(value) : boolean
WeakSet.prototype.delete(value) : boolean
```
Important thing to note `WeakSet` is a collection that can‘t be iterated and whose size cannot be determined.
Find more details about `WeakSet` [**here**](https://developer.mozilla.org/en-US/docs/Web/JavaScript/Reference/Global_Objects/WeakSet)
You can find a more complete ES6 cheetsheet on my [Github](https://github.com/mihaiserban/es6-cheetsheet/blob/master/README.md) page.
---
### javascript-es6-cheatsheet-spread-operator.md
### Spread Operator
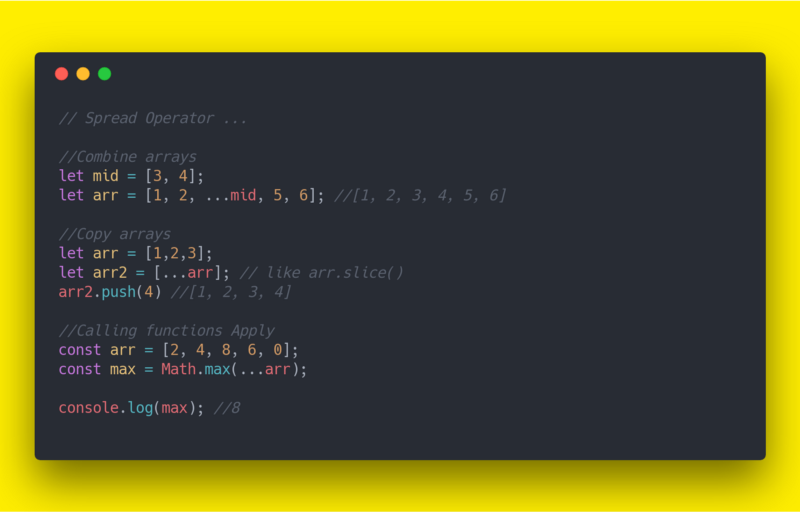
The spread syntax is simply three dots: `...` It allows an iterable to expand in places where 0+ arguments are expected.
### Calling Functions without Apply:
```
function doStuff (x, y, z) { }
var args = [0, 1, 2];
// Call the function, passing args
doStuff.apply(null, args);
doStuff(...args);
```
Using spread operator:
```
const arr = [2, 4, 8, 6, 0];
const max = Math.max(...arr);
console.log(max); //8
```
Or another example using Math functions:
```
let mid = [3, 4];
let arr = [1, 2, ...mid, 5, 6]; //[1, 2, 3, 4, 5, 6]
```
### Combine arrays
```
let arr = [1,2,3];
let arr2 = [...arr]; // like arr.slice()
arr2.push(4)
```
You can find a more complete ES6 cheetsheet on my [Github](https://github.com/mihaiserban/es6-cheetsheet/blob/master/README.md) page.
---
### javascript-es6-cheatsheet-string-templates.md
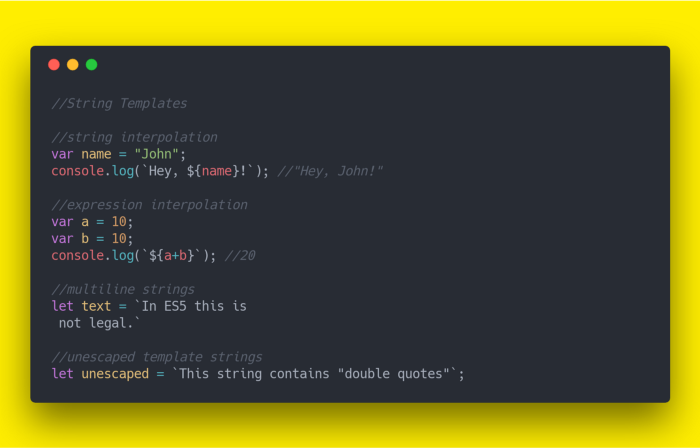
Template Strings use back-ticks (\`\`) rather than the single or double quotes we’re used to with regular strings. A template string could thus be written as follows:
```
const greeting = `Yo World!`;
```
**String Substitution**:
Substitution allows us to place any valid JavaScript expression inside a Template Literal, the result will be output as part of the same string.
Template Strings can contain placeholders for string substitution using the ${ } syntax:
```
var name = "Brendan";
console.log(`Yo, ${name}!`); //"Yo, Brendan!"
```
We can use expression interpolation to embed for some readable inline math:
```
var a = 10;
var b = 10;
console.log(`${a+b}`); //20
```
They are also very useful for functions inside expressions:
```
function fn() { return "inside fn"; }
console.log(`outside, ${fn()}, outside`); // outside, inside fn, outside.
```
__Multiline Strings:__
Multiline strings in JavaScript have required hacky workarounds for some time. Template Strings significantly simplify multiline strings. Simply include newlines where they are needed and BOOM.
```
let text = `In ES5 this is
not legal.`
```
__Unescaped template strings:__
We can now construct strings that have special characters in them without needing to escape them explicitly.
```
var escapedText = "This string contains \"double quotes\" which are escaped.";
let templateText = `This string contains "double quotes" which don't need to be escaped anymore.`;
```
---
### javascript-es6-cheatsheet-variable-declarations.md
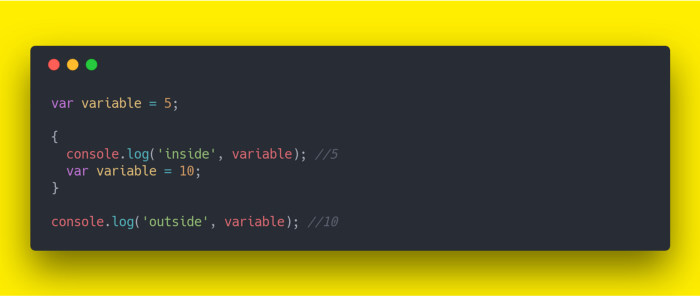
ES6 brought `let` and `const` with proper lexical scoping. `let` is the new `var`. Constants work just like `let`, but can’t be reassigned. `let` and `const` are block scoped. Therefore, referencing block-scoped identifiers before they are defined will produce a `ReferenceError`.
Example using `var`:
```
var variable = 5;
{
console.log('inside', variable); //5
var variable = 10;
}
console.log('outside', variable); //10
```
Example using `const`:
```
const variable = 5;
variable = variable*2; // TypeError: Attempted to assign to readonly property.
```
Constants are tricky with array and objects. The `reference` becomes constant but the value does not.
```
const variable = [5];
console.log(variable) // [5]
variable = [2]; //TypeError: Attempted to assign to readonly property.
variable[0] = 1;
console.log(variable) // [1]
```
You can find a more complete ES6 cheetsheet on my [Github](https://github.com/mihaiserban/es6-cheetsheet/blob/master/README.md) page.
---
### neural-llm-router-coding-assistant.md
I run an AI gateway that sits between my coding agents and a pool of LLM providers. The gateway handles health checks, failover, and model resolution. But it had one blind spot: it never looked at the *content* of what I was asking.
Every request was routed based on whatever model the agent picked. If opencode chose `coder`, the gateway used that pool. That leaves the gateway unable to distinguish an exploration request such as "search the codebase for User model references" from a request that needs a stronger coding model.
So I built a neural router that reads the *first user message* and classifies it into one of four task types: **explore**, **plan**, **build**, or **quick**. The task type selects a model pool and a configured reasoning effort. The classifier is a 7,168-weight linear head on top of Qwen3-0.6B.
---
## The architecture
The router is a sidecar service. The gateway calls it over HTTP, falls back to the default model if it's unreachable, and opens a circuit breaker after the first failure.
```text
openCode/Codex → gateway :4100 → router sidecar :5560 → Qwen3-0.6B → head → {task,reasoning}
│
└─ (fallback) config.default_model
```
The head is inspired by [TRINITY](https://arxiv.org/abs/2512.04695) (Xu et al., ICLR 2026), but it is a smaller custom adaptation. It is one weight matrix, `W ∈ R^{7×1024}`, with no bias or activation: 7,168 weights in total. Seven logits split into two softmax groups:
| Group | Dimensions | Outputs |
|---|---|---|
| Task type | 4 logits | explore, plan, build, quick |
| Reasoning effort | 3 logits | low, medium, high |
TRINITY uses a different coordinator head with model-selection and role logits, and tunes additional backbone parameters. This router instead uses a fixed Qwen3-0.6B encoder and the 7-way head above. At inference, it mean-pools the final-layer token states into a 1024-dimensional, L2-normalized vector and multiplies it by the head. The task output maps into the gateway's routing config:
```yaml
task_to_combo:
explore: explorer # exploration pool
plan: planner # planning pool
build: coder # coding pool
quick: coder-fast # short-request pool
task_to_reasoning:
explore: low
plan: high
build: high
quick: low
```
---
## Training data came from my own sessions
I did not collect a separate dataset. opencode stores sessions in a SQLite database at `~/.local/share/opencode/opencode.db`. Each session has an `agent` field, which I used as a weak task-type label:
```sql
SELECT s.agent, s.model, p.data
FROM session s
JOIN message m ON m.session_id = s.id
JOIN part p ON p.message_id = m.id
WHERE s.agent IN ('build', 'plan', 'explore', 'librarian', 'general')
AND json_extract(m.data, '$.role') = 'user'
AND json_extract(p.data, '$.type') = 'text'
```
The `agent` field was my label. I mapped it as follows:
| opencode agent | Task type | Labeled rows |
|---|---|---|
| explore, librarian | explore | 53 |
| plan | plan | 192 |
| build | build | 383 |
| build (commit, bash, git, etc.) | quick | 181 |
The `quick` split is heuristic: build messages containing terms such as "commit", "git push", "bash", or "run" were relabeled quick. These category counts total 809. The query can return multiple text parts per session, so a session-level evaluation needs an explicit selection rule and a split that keeps each session's examples together.
---
## A local training run
In one local run, penultimate-token encoding with SGD reached 47.5% task accuracy. Its hidden-state cosine similarities were 0.3–0.5 both within and between these labels, so that representation did not separate the classes well in this dataset.
I changed pooling and optimization for the next run:
**Mean pooling instead of the penultimate token.** A penultimate hidden state can attend across the sequence; it is not a representation of only the last word. I switched to averaging token states for single-message classification. TRINITY's use of a penultimate state addresses a different coordinator design and input setting.
**Adam with class-weighted loss.** The build class dominated (383 rows versus 53 explore rows). I used inverse-frequency class weights and Adam at `lr=0.001`:
| Epoch | Task accuracy | Reasoning accuracy | Loss |
|---|---|---|---|
| 20 | 67.3% | 86.4% | 1.47 |
| 100 | 73.3% | 88.9% | 0.92 |
| 200 | 78.6% | 91.2% | 0.73 |
Treat these as training-run metrics: the figures here do not include a held-out split, seed, repeat count or software versions. They also do not isolate the effect of pooling from the optimizer change. The reasoning labels come from the fixed task-to-reasoning mapping, so their accuracy mainly checks whether the head reproduced that derived label.
---
## Inference on Apple Silicon
Qwen3-0.6B runs on MPS. This simplified FastAPI response shape shows the head outputs:
```python
@app.post("/route")
async def route(req: RouteRequest) -> RouteResponse:
h = encoder.encode_mean_pool(req.transcript)
task_type, reasoning, debug = head.select(torch.as_tensor(h))
return RouteResponse(
task_type=task_type.value,
reasoning_effort=reasoning.value,
)
```
The snippet returns the raw head prediction. It does not show which value the gateway ultimately applies when that prediction conflicts with the configuration.
In the recorded M3 Max run, latency was **96ms warm and 624ms cold start**. The head weights file is 30KB. These measurements are local observations, not a benchmark across machines or workloads.
Task-head predictions from the recorded sample:
```
"Search the codebase for User model" → explore (70.4%)
"Write a function to parse markdown" → build (68.5%)
"Commit changes with fix message" → quick (66.2%)
"Design a real-time chat architecture"→ build (40.3%)
```
The raw reasoning output for the commit example was `high (51.0%)`, while the shown configuration maps `quick` to `low`. That disagreement needs a defined precedence rule at the gateway. The snippets here do not establish which value it ultimately applies, so the sample table reports only task predictions.
The plan/build boundary was the hardest in this label set: "design system architecture" and "write a function" share structured, code-related vocabulary. I currently map uncertain coding requests to build, but that is a routing policy choice, not evidence that it is optimal.
---
## What's next
**Deployment-level optimization.** Right now the router picks a combo bucket. A future version could score deployments within a bucket using health, latency, price, and task success. TRINITY uses sep-CMA-ES to optimize its coordinator under an evaluation budget. A score such as `quality - λ × cost` would be my own proposed objective and would need comparable-task measurements before I could use it to choose providers.
**Self-improving C-A-F loop.** [Agent-as-a-Router](https://arxiv.org/abs/2606.22902) describes a Context-Action-Feedback loop with routing, verification, and memory components. My gateway already logs usage events to Postgres, including token counts, latency, served deployment, and cache hits. A verifier and a history of routing decisions would make it possible to evaluate an online-learning extension; they would not by themselves establish that it improves routing.
**Avoiding routing collapse.** In their experiments, [When Routing Collapses](https://arxiv.org/abs/2602.03478) describes routers increasingly selecting expensive models as the cost budget rises and proposes ranking-based EquiRouter. I would evaluate a ranking approach when this router moves to deployment-level routing.
---
## Current scope
This 7,168-weight head uses a local, weakly labeled dataset to select a task pool for coding requests. The recorded warm latency was under 100ms on one M3 Max machine. It still needs a documented split, baseline, repeated evaluation, and cost per successfully completed comparable task before it can support a claim about accuracy beyond the training run or about savings. If the router is unavailable, the gateway falls back to its configured default.
---
### neural-router-assembly-reconstruction.md
I run an AI gateway between my coding agents and a pool of LLM providers. It handles health checks, failover, and model resolution, but it does not inspect the content of a request before choosing a routing pool.
I built a neural router that reads the first user message and classifies it as **explore**, **plan**, **build**, or **quick**. The task type selects a model pool and configured reasoning effort. The classifier is a 7,168-weight linear head on top of Qwen3-0.6B.
## The architecture
The router is a sidecar service. The gateway calls it over HTTP, falls back to its configured default if the router is unavailable, and opens a circuit breaker after the first failure.
The head is inspired by [TRINITY](https://arxiv.org/abs/2512.04695), but it is a custom adaptation. It is one weight matrix, `W ∈ R^{7×1024}`, with no bias or activation: 7,168 weights. Seven logits split into four task logits and three reasoning-effort logits.
TRINITY uses a different coordinator head with model-selection and role logits, and tunes additional backbone parameters. This router uses a fixed Qwen3-0.6B encoder and the 7-way head above. It mean-pools the final-layer token states into a 1024-dimensional, L2-normalized vector and multiplies it by the head.
```yaml
task_to_combo:
explore: explorer # exploration pool
plan: planner # planning pool
build: coder # coding pool
quick: coder-fast # short-request pool
task_to_reasoning:
explore: low
plan: high
build: high
quick: low
```
## Training data from my sessions
opencode stores sessions in a SQLite database. Each session has an `agent` field, which I used as a weak task-type label. I mapped the existing labels to four task types. The `quick` category was derived heuristically from build messages containing terms such as "commit", "git push", "bash", or "run".
| opencode agent | Task type | Labeled rows |
|---|---|---|
| explore, librarian | explore | 53 |
| plan | plan | 192 |
| build | build | 383 |
| build (commit, bash, git, etc.) | quick | 181 |
These category counts total 809. The source query can return multiple text parts per session, so a session-level evaluation needs an explicit selection rule and a split that keeps each session's examples together.
## A local training run
In one local run, penultimate-token encoding with SGD reached 47.5% task accuracy. Its hidden-state cosine similarities were 0.3 to 0.5 both within and between these labels, so that representation did not separate the classes well in this dataset.
I changed pooling and optimization for the next run. A penultimate hidden state can attend across the sequence; it is not a representation of only the last word. TRINITY's use of a penultimate state addresses a different coordinator design and input setting. The reported figures do not isolate the contribution of pooling from the optimizer change.
The build class dominated, with 383 rows versus 53 explore rows. I used inverse-frequency class weights and Adam at `lr=0.001`; the epoch-200 training metrics were 78.6% task accuracy, 91.2% reasoning accuracy, and 0.73 loss.
Treat these as training-run metrics. The figures here do not include a held-out split, seed, repeat count, or software versions. They also do not isolate pooling from the optimizer change. The reasoning labels come from the fixed task-to-reasoning mapping, so their accuracy mainly checks whether the head reproduced that derived label.
## Inference on Apple Silicon
Qwen3-0.6B runs on MPS. In a recorded M3 Max run, latency was **96ms warm and 624ms cold start**. The head weights file is 30KB. These are local observations, not a benchmark across machines or workloads.
Task-head predictions from the recorded sample:
```text
"Search the codebase for User model" → explore (70.4%)
"Write a function to parse markdown" → build (68.5%)
"Commit changes with fix message" → quick (66.2%)
"Design a real-time chat architecture" → build (40.3%)
```
The raw reasoning output for the commit example was `high (51.0%)`, while the configuration maps `quick` to `low`. The post does not document how that conflict is handled, so the sample reports task predictions only.
The plan/build boundary was the hardest in this label set. I currently map uncertain coding requests to build, but that is a routing-policy choice, not evidence that it is optimal.
## What's next
**Deployment-level optimization.** The router currently picks a model pool. A future version could score deployments within a pool using health, latency, price, and task success. TRINITY uses sep-CMA-ES to optimize its coordinator under an evaluation budget. A score such as `quality - λ × cost` would be my proposed objective and would need comparable-task measurements before provider selection could rely on it.
**Self-improving C-A-F loop.** [Agent-as-a-Router](https://arxiv.org/abs/2606.22902) describes a Context-Action-Feedback loop with routing, verification, and memory components. My gateway logs usage events to Postgres, including token counts, latency, served deployment, and cache hits. A verifier and a history of routing decisions would make an online-learning extension possible to evaluate; they would not by themselves establish an improvement.
**Avoiding routing collapse.** In their experiments, [When Routing Collapses](https://arxiv.org/abs/2602.03478) describes routers increasingly selecting expensive models as the cost budget rises and proposes ranking-based EquiRouter. I would evaluate a ranking approach when this router moves to deployment-level routing.
This 7,168-weight head uses a local, weakly labeled dataset to select a task pool. It needs a documented split, baseline, repeated evaluation, and cost per successfully completed comparable task before it can support a claim about savings.
---
### replacing-orchestrator-agents-with-governance-worker-synthesis.md
My coding agents previously kept planning, worker results, and synthesis in one orchestrator conversation. On a multi-file refactor, three worker results accumulated in that conversation before the final response. It was difficult to inspect the handoffs or give synthesis a focused input.
That is a constraint of this workflow, not a verdict on every orchestrator design. A coordinator can still be useful for planning and recovery. I changed where it keeps detailed worker output and how synthesis starts.
## The three-stage workflow I implemented
I use three stages backed by filesystem state: governance, a variable number of workers, and synthesis.
```
User → Governance (plans, writes task specs to .agent-state/tasks/*.yaml)
│
│ spawns workers with: "Read task spec. Write result to file. Confirm."
▼
┌──────────┐ ┌──────────┐ ┌──────────┐
│ Worker 1 │ │ Worker 2 │ │ Worker N │ ← fresh contexts
└────┬─────┘ └────┬─────┘ └────┬─────┘
│ │ │
▼ ▼ ▼ (writes to disk, returns short confirmation)
.agent-state/results/*.yaml ← shared filesystem state
│
▼
Synthesis agent (fresh context, reads result files, produces final answer)
│
▼
User ← clean, focused output
```
I configure governance to plan, write task specifications, and delegate rather than perform the assigned unit of work or synthesize the final response. Each worker receives a task-spec path and result path. Workers write structured results to YAML and return a short confirmation. When the fanout finishes, a fresh synthesis agent reads the result files and produces the final response. This separation is a workflow convention; it needs tool permissions if governance must be technically prevented from editing project files.
An illustrative task specification:
```yaml
# .agent-state/tasks/analyze-auth.yaml
goal: audit the authentication module for security issues
constraints: do not modify the database schema
expected_output_path: .agent-state/results/analyze-auth.yaml
context_files: [src/auth/middleware.ts, src/auth/session.ts]
blocked_on: null
```
An illustrative result schema:
```yaml
# .agent-state/results/analyze-auth.yaml
status: ok
summary: example findings from a security review
findings:
- severity: critical
summary: example review finding
files_changed: []
blockers: []
verification_gaps:
- could not verify third-party OAuth callback flow end-to-end
```
The plugin I wrote, replacing the old orchestrator-minion watchdog, adds two capabilities beyond inactivity detection:
1. **Fanout completion tracking**: when all workers for a fanout are done, the plugin nudges governance to start synthesis.
2. **Path-aware recovery**: when a worker stalls, the recovery prompt includes the task-spec and expected-result paths, so governance can inspect the state before deciding whether to wait, re-brief, or report a blocker.
```text
A watched worker may be inactive.
Task spec: .agent-state/tasks/analyze-auth.yaml
Expected result: .agent-state/results/analyze-auth.yaml
Inspect the child session, then decide: wait, re-brief, or report a blocker.
```
## What the workflow changes
For a multi-file refactor, the intended differences are:
| | Before (orchestrator-minion) | After (governance-worker-synthesis) |
|---|---|---|
| Governance context | Detailed worker results in the same conversation | Worker confirmations and paths |
| Handoff format | Natural language summaries | Structured YAML on disk |
| Synthesis context | Same orchestrator conversation | Fresh context reading result files |
| Stale worker recovery | Session-only prompt | Task-spec and result paths included |
The synthesis stage receives finished result files rather than governance discussion, worker chatter, and recovery prompts. That makes its input easier to inspect and reproduce. These workflow differences do not establish a quality improvement; that would require a controlled comparison on similar tasks.
## Why I chose this structure
**[ExtAgents](https://arxiv.org/abs/2505.21471)** found benefits from distributing external knowledge across agents for its multi-hop question-answering and long-survey tasks. That supports testing parallel work when inputs are independent; it does not establish the same result for coding tasks.
**[ReAcTree](https://arxiv.org/abs/2511.02424)** reports 61% goal success versus 31% for ReAct on WAH-NL with Qwen 2.5 72B. Its task-tree approach is useful when subgoals and dependencies are explicit.
**[The Organizational Behavior of Agentic AI](https://arxiv.org/abs/2606.30986)** finds that human-imitation organization forms often underperform shared-state or adaptive forms under its tested interface conditions. I take that as a reason to make handoffs inspectable, not as a universal architecture rule.
## What still needs work
**Elastic context (ACE).** [ACE](https://arxiv.org/abs/2606.31564) describes adaptive compression for message history. I have not implemented it. If governance itself grows during a large fanout, I would evaluate it against task-specific retrieval and summaries rather than assume one compression strategy is lossless.
**Dependency-aware fanout.** Right now, fanout assumes all workers are fully independent. If task B needs task A's output, governance must serialize them manually. ReAcTree's dynamic tree construction could automate this.
**Structured handoff standardization.** The YAML schemas I use are project-specific. A small vocabulary such as `status`, `findings`, `files_changed`, `blockers`, and `verification_gaps` is a useful starting point, but projects still need fields that match their tools and review process.
---
### runtime-skill-evals-as-assembly-theory.md
We compared coding-agent outputs with and without a loaded skill to see which behaviors changed.
Reading a skill can reveal unclear instructions, but runtime tests show how the agent responds to them. For example, a reproduction step adds little on a task where the agent already reproduces the bug without prompting.
You need a runtime test: run the same task with and without the skill, grade the outputs against assertions, and measure the delta. Anthropic's [skill-creator](https://github.com/anthropics/skills/tree/main/skills/skill-creator) does this via subagent spawning. We wanted the same thing, but using the [pi coding agent](https://pi.dev) as our harness.
The [skill pack](https://github.com/mihaiserban/skills) contains 29 skills for engineering workflows, design translation, git operations and research. Each skill is a `SKILL.md` file with frontmatter and instructions that an agent loads on-demand.
---
## The Method
The eval pipeline has three stages, all scriptable and CI-friendly:
```text
eval-runner → runs each eval with and without the skill (parallel)
eval-grader → grades outputs against assertions (batch LLM)
eval-aggregator → produces benchmark + review artifacts
```
The baseline needs **skill isolation**. In this harness, global skill directories are temporarily moved so the baseline cannot discover them. The other variant explicitly loads the tested skill and any declared dependencies.
For skills with dependencies (an orchestrator that routes to sub-skills, for instance), the eval declares those dependencies and the runner loads them all. Composition is a real architectural concern, not an afterthought.
Each eval carries 3–7 assertions that check specific, verifiable outcomes. The grader receives all assertions for one eval variant in a single model call and returns numbered PASS/FAIL verdicts. Those judgments still need review, especially when the score disagrees with the observed behavior.
---
## The Numbers
25 skills. 2 evals each. 100 total runs across 8 parallel workers.
97 runs completed. Three timed out in the "with skill" variant during code generation. The timeouts need investigation alongside the completed-run scores.
**20 of 25 skills show positive delta.** 4 show no measurable difference. 1 shows a negative delta.
---
## What the Deltas Tell You
The score differences suggest several places to inspect the outputs:
**Largest improvements.** Governance, design and audit skills had some of the largest gains in assertion pass rate. They specify a plan → delegate → synthesize workflow, a wireframe before code, or an audit rubric. These results concern the tested tasks, not everything the model can do without those instructions.
**Smaller improvements.** Some gains came from particular assertions, such as a git cleanup step or an output-format requirement. The individual outputs show which step the skill helped with.
**No measured difference.** The skill may add little on a given task, or the assertions may miss the behavior it changes. Equal scores alone do not distinguish these explanations.
**Lower score with the skill.** The domain-modeling variant asked for more context and scored 67 percentage points lower. Review the prompt and response to decide whether the request was warranted. The score alone cannot tell you whether the skill or the evaluation needs changing.
---
## Reviewing the results
The recorded 100-run benchmark took about 15 minutes with 8 parallel workers. Its per-eval outputs help identify changed behavior and failures. With two evals per skill and an LLM grader, broader conclusions need more tasks, repeated runs and a review of the judgments.
The [repository](https://github.com/mihaiserban/skills) includes the skills, harness and evals needed to run the comparison.
---
### runtime-skill-evals-with-pi.md
We ran the same coding tasks with and without agent skills, then compared the outputs against a set of assertions. This post covers the harness and the results from 25 skills.
The [repository](https://github.com/mihaiserban/skills) contains 29 agent skills for engineering workflows, design translation, git operations and research. Each skill is a `SKILL.md` file with frontmatter and instructions that an agent loads on-demand.
---
## The Problem
Static review tells you a skill is well-written. It doesn't tell you whether the skill changes outcomes.
A skill that says "always reproduce the bug before fixing it" is good advice. But if the model already does that by default, the skill adds tokens without changing behavior. You need a runtime test: run the same task with and without the skill, grade the outputs, and measure the delta.
This is what [Anthropic's skill-creator](https://github.com/anthropics/skills/tree/main/skills/skill-creator) does: spawn subagents with and without the skill and compare results. We wanted the same thing, but using the [pi coding agent](https://pi.dev) as our harness.
---
## The Harness
The eval pipeline has three stages, all scriptable and CI-friendly:
```text
eval-runner.py → runs each eval with and without the skill (parallel)
eval-grade.py → grades outputs against assertions (batch LLM)
eval-aggregate.py → produces benchmark.json + HTML review
```
The runner uses pi with full skill isolation:
```bash
# Without skill: zero skills loaded, no contamination
pi --no-skills --no-extensions -e ~/.pi/agent/extensions/gateway \
--no-context-files --no-session \
--model gateway/planner -p "eval prompt"
# With skill: only the tested skill, nothing else
pi --no-skills --no-extensions -e ~/.pi/agent/extensions/gateway \
--no-context-files --no-session \
--skill /path/to/SKILL.md \
--model gateway/planner -p "eval prompt"
```
The `--no-skills` flag prevents all skill discovery. Global skill directories (`~/.agents/skills/`, `~/.pi/agent/skills/`) are physically moved during eval runs to guarantee the baseline can't cheat. The `--skill ` flag explicitly loads the tested skill alongside `--no-skills`.
For skills with dependencies (like the design orchestrator that routes to picker → apply → audit), the evals.json declares `skill_deps` and the runner passes multiple `--skill` flags.
---
## The Evals
25 skills, 2 evals each, 100 total runs across 8 parallel workers. Each eval has 3-7 assertions that check specific, verifiable outcomes:
```json
{
"skill_name": "kill-dead-code",
"evals": [
{
"id": 1,
"name": "remove-unused-function",
"prompt": "Clean up this module. I think some functions are never called...",
"assertions": [
{"id": "identifies-dead", "text": "Identifies all four dead functions", "type": "quality"},
{"id": "keeps-live", "text": "Keeps the two used exports", "type": "quality"},
{"id": "warns-exports", "text": "Warns unused exports might be public API", "type": "behavior"}
]
}
]
}
```
Grading uses a batch LLM approach: all assertions for one eval variant go to a single `gateway/coder` call. The grader receives the model output in XML tags (to avoid code-fence collision bugs) and returns numbered PASS/FAIL verdicts.
---
## The Numbers
Of 100 runs, 97 completed and 3 timed out. All three timeouts were in the `with_skill` variant during code generation. The table shows assertion pass rates; delta is the percentage-point difference between the displayed rates.
| Skill | With Skill | Without Skill | Delta |
|-------|-----------|---------------|-------|
| governance-fanout | 89% | 11% | +78 pp |
| show-first | 85% | 15% | +70 pp |
| design-md-style-audit | 67% | 0% | +67 pp |
| pr-from-diff | 90% | 40% | +50 pp |
| design (orchestrator) | 89% | 44% | +45 pp |
| blog-post | 100% | 60% | +40 pp |
| context-budget | 88% | 50% | +38 pp |
| systematic-debugging | 83% | 50% | +33 pp |
| revert-surgical | 100% | 78% | +22 pp |
| changelog-from-diff | 100% | 80% | +20 pp |
| input-validation | 100% | 80% | +20 pp |
| design-md-style-apply | 83% | 67% | +16 pp |
| design-taste-distiller | 50% | 33% | +17 pp |
| research | 58% | 42% | +16 pp |
| kill-dead-code | 71% | 57% | +14 pp |
| decision-record | 100% | 89% | +11 pp |
| adversarial-verify | 100% | 90% | +10 pp |
| sql-review | 70% | 60% | +10 pp |
| secret-scan | 36% | 27% | +9 pp |
| clean-commits | 100% | 91% | +9 pp |
| design-md-style-picker | 100% | 100% | 0 pp |
| bisect-regression | 100% | 100% | 0 pp |
| contract-test | 90% | 90% | 0 pp |
| rebase-safely | 80% | 80% | 0 pp |
| domain-modeling | 11% | 78% | -67 pp |
**20 of 25 skills show positive delta.** 4 show no measurable difference. 1 shows a negative delta.
---
## What the Deltas Tell You
**Largest improvements.** The biggest gains came from skills specifying a workflow: plan → delegate → synthesize for `governance-fanout`, a wireframe before code for `show-first`, and an audit rubric for `design-md-style-audit`. The results show higher assertion pass rates on these tasks; they do not establish what the model could never do without a skill.
**Smaller improvements.** Other skills helped with particular assertions, such as a cleanup step in a git workflow or the output format required by `changelog-from-diff`. Inspect the individual outputs to see which behavior changed.
**No measured difference.** `contract-test` scored 90% with and without its skill; `rebase-safely` scored 80% in both variants. Equal scores could mean the skill adds little on these tasks, or that the assertions miss the behavior it changes.
**Lower score with the skill.** `domain-modeling` scored 11% with the skill and 78% without it. The skill-loaded variant asked for more domain context. Review whether that request was warranted by the prompt before deciding whether to change the skill or the evaluation.
---
## Running the Benchmark
```bash
# Full pipeline: run → grade → aggregate, all skills, 8 parallel workers
bash scripts/start-evals.sh --all --parallel 8
# Or step by step
python3 scripts/eval-runner.py --all --parallel 8
python3 scripts/eval-grade.py --all --parallel 8 --model gateway/coder
python3 scripts/eval-aggregate.py --all --output html
```
Each skill gets `eval-results/iteration-1/` with `benchmark.json`, `benchmark.md`, and a `review.html` showing per-eval outputs and assertion pass/fail.
Skills that reference other skills, such as the design orchestrator routing to picker → apply → audit, declare `skill_deps` in `evals.json`. The runner loads these dependencies with additional `--skill` flags.
---
## Reviewing a run
The recorded 100-run benchmark took about 15 minutes with 8 parallel workers. Use the per-eval outputs to investigate score changes and timeouts. Two evals per skill and an LLM grader are a starting point for finding problems, not a general verdict on each skill.
The [repository](https://github.com/mihaiserban/skills) includes the 29 skills, harness and evals. Run `bash scripts/start-evals.sh --all` to generate the results and review artifacts.
---
### semantic-search-assembly-reconstruction.md
A search for *"how do I take money out of my account"* should find *"Withdrawal Methods"*. Keyword search can miss that connection when the indexed text has no matching words. An embedding model may retrieve it because the texts express similar intent.
This is an example knowledge-base search architecture. The candidate counts and ranking scores below are illustrative, not production measurements.
## Lexical, semantic, and hybrid search
**Lexical search** such as BM25 is useful for exact strings including product codes, error messages, and proper nouns. **Semantic search** can retrieve paraphrases, but rare names and identifiers may rank poorly. **Hybrid search** combines candidates from both methods, for example with Reciprocal Rank Fusion, before reranking.
Compare against a lexical baseline when users search for identifiers or error codes. A hybrid approach adds retrieval and tuning work, so measure whether it improves representative queries.
## Two-stage retrieval
```text
Query → Query embedding → Vector search → 30 chunks → Reranker → Article results
```
A bi-encoder embeds documents independently of queries. Store document vectors ahead of time, then embed a query and retrieve nearby vectors. A cross-encoder scores the resulting query-document pairs together. It adds work for every candidate, so the candidate set should be bounded.
For the withdrawal query, retrieval might return chunks from *Withdrawal Methods*, *Bank Transfer Limits*, *ATM Cash Withdrawal*, and *Account Closure*. The reranker can reorder those chunks, after which the API groups them into articles. It cannot recover an article that retrieval did not supply.
## Model choice includes language and input formatting
One possible embedding model is [`intfloat/multilingual-e5-small`](https://huggingface.co/intfloat/multilingual-e5-small), which produces 384-dimensional vectors. Its retrieval inputs should start with `query: ` or `passage: `, including non-English text:
```text
query: how do I take money out of my account
passage: Withdrawal Methods. You can withdraw funds by ...
```
Follow the model's pooling and normalization guidance. L2 normalization makes the dot product equal cosine similarity; it does not calibrate relevance across queries. A score of 0.8 on one query need not carry the same meaning on another.
For English, [`cross-encoder/ms-marco-TinyBERT-L2-v2`](https://huggingface.co/cross-encoder/ms-marco-TinyBERT-L2-v2) is a small reranker to evaluate. Its model card is tagged English and describes MS MARCO training. Pairing it with a multilingual embedding model does not establish multilingual ranking quality. Evaluate a multilingual knowledge base in each supported language.
Benchmark inference with your text lengths, candidate count, batch size, and expected concurrency. Model names alone do not establish a latency target or whether a GPU is economical.
## Vector storage with PostgreSQL and pgvector
If the application already uses PostgreSQL, pgvector can keep search data in the same database and transactions. Here is a starting schema for 384-dimensional vectors:
```sql
CREATE EXTENSION IF NOT EXISTS vector;
CREATE TABLE embeddings (
id BIGSERIAL PRIMARY KEY,
article_id TEXT NOT NULL,
tenant TEXT NOT NULL,
language TEXT NOT NULL,
chunk_type TEXT NOT NULL,
text TEXT NOT NULL,
embedding VECTOR(384) NOT NULL,
created_at TIMESTAMPTZ DEFAULT NOW()
);
CREATE INDEX ON embeddings USING hnsw (embedding vector_cosine_ops);
CREATE INDEX ON embeddings (tenant, language);
```
```sql
SELECT article_id, chunk_type, text,
1 - (embedding <=> $1::vector) AS similarity
FROM embeddings
WHERE tenant = $2 AND language = $3
ORDER BY embedding <=> $1::vector
LIMIT 30;
```
Ordering by the distance operator with a limit makes the query eligible to use the HNSW index, although PostgreSQL still chooses the plan. Check it with `EXPLAIN ANALYZE` on representative data.
With approximate indexes, pgvector applies filters after scanning index candidates. A selective tenant or language filter can leave fewer than 30 results. Starting with pgvector 0.8.0, iterative index scans can search further up to configured limits. Depending on the workload, exact filtered search, partitioning, or partial indexes may fit better. Measure recall as well as query time. [pgvector filtering documentation](https://github.com/pgvector/pgvector#filtering)
A tenant column is one storage design, not an authorization boundary by itself. Derive the tenant from authenticated context and enforce article access rules in retrieval. Choose shared tables, row-level security, or stronger separation according to the application's isolation requirements.
## Chunking changes what can be found
Titles, summaries, and sections are useful starting boundaries. Split oversized sections to fit the model's token limit while retaining enough context to identify the chunk. For text without useful boundaries, overlapping token windows are another option. Tune chunk size and overlap against representative questions.
Each chunk points to its parent article. After reranking, one aggregation rule is to keep the best-scoring chunk per article. This avoids rewarding long articles simply for having many paragraphs, and means 30 retrieved chunks may produce fewer than 30 articles.
Chunk-type weights are a heuristic to test. With illustrative nonnegative similarity scores, a title weight of 1.0 and paragraph weight of 0.7 gives:
```text
Article A: Reset Multi-Factor Authentication
title = 0.78; paragraph = 0.74
weighted maximum = max(0.78 × 1.0, 0.74 × 0.7) = 0.78
Article B: Account Security Best Practices
title = 0.70; paragraph = 0.82
weighted maximum = max(0.70 × 1.0, 0.82 × 0.7) = 0.70
```
Without weighting, B wins with 0.82 against A's 0.78. With these weights, A wins with 0.78 against B's 0.70. The example shows how the heuristic can change ordering; it does not establish that the changed order is better. A paragraph discount cannot guarantee that a title match wins. If applying weights to reranker outputs, account for their scale: multiplying a negative score by 0.7 increases it rather than penalizing it.
## Ingestion and caching
For bulk imports or slow embedding work, an ingestion endpoint can validate and durably enqueue an update, then return `202 Accepted` with a tracking ID. A worker chunks, embeds, and stores it separately from search traffic.
Prepare replacement embeddings before removing current ones. Replace an article's chunks in a transaction scoped by tenant and article ID, so readers see either the old set or the new set. Give updates versions and make retries idempotent; an older job finishing late must not overwrite newer content.
A result cache avoids retrieval and reranking for repeated searches. Query-embedding caching is a separate option when the same query is reused with different filters. Stored document vectors do not eliminate query-embedding work.
```text
search:{tenant}:{generation}:{model_version}:{lang}:{access_hash}:{filter_hash}:{query_hash}
```
A result-cache key must include every input that changes the answer, including tenant, language, filters, access scope, and model or index version. Hash a canonical representation of the actual search inputs.
Redis `DEL` accepts literal keys. `DEL search:{tenant}:*` does not expand the wildcard. One invalidation approach increments a tenant generation after an index update and uses that generation in subsequent cache keys. Another iterates with `SCAN MATCH` and deletes returned keys explicitly. Neither makes a database write and a Redis update atomic, so handle invalidation failures and avoid caching an in-flight result under a newer generation than the one it searched. [Redis DEL](https://redis.io/docs/latest/commands/del/), [SCAN](https://redis.io/docs/latest/commands/scan/)
Choose the TTL from the allowed staleness. Permission changes may need stronger handling than ordinary article edits; cached results must not bypass current access checks.
## Measure before splitting services
Start with a deployment you can operate. Isolate ingestion from interactive searches when they compete for resources. Split embedding and reranking into independently scaled services when measurements show different capacity or release needs.
Candidate count, text length, batching, and concurrency affect reranker cost. Record throughput and end-to-end p50, p95, and p99 latency under load. Set a budget for the full request, including network and orchestration overhead. Stage timings locate bottlenecks, but adding stage percentiles does not produce an end-to-end percentile.
## Evaluate with knowledge-base questions
Build a labeled set of queries and relevant article IDs. Include paraphrases, identifiers, supported languages, access restrictions, and queries with no relevant answer. Keep a held-out set when tuning models, chunk sizes, or weights.
Track retrieval recall at the candidate cutoff, final MRR or nDCG, end-to-end latency, and freshness after updates. These measurements overlap: changing chunking or retrieval can change both the candidate set and final ranking.
When a query fails, inspect its trace. If the relevant article never entered the candidate set, check ingestion, chunking, filters, and retrieval. If it arrived but ranked poorly, inspect reranker scores and article aggregation first. Keep the failing query as a regression example.
---
### independent-contractor.md
Specializing in development and consulting for modern web and cloud-based applications, including:
- ReactJS front-end development
- AWS-based architecture and solutions
- Node.js back-end services
- Microservices architecture
- Mobile application development for iOS
Experienced in designing, building, and maintaining scalable applications across full-stack and cloud environments.
---
### ios-developer-skobbler-aquired-by-telenav-inc.md
At skobbler,
I was part of a large team of iOS and C++ developers building location-based applications powered by OpenStreetMap.
Some of the products I contributed to included GPS Navigation, ForeverMap, GeoBrain, and Blitzer.de.
__Contributions__
- Contributed to the development and continuous improvement of mobile navigation applications used by millions of users.
- Designed and implemented reusable components to support scalability and maintainability across projects.
- Performed code reviews and helped maintain high engineering and code quality standards within the team.
- Collaborated closely with the QA department to identify, track, and resolve software defects.
- Participated in Scrum ceremonies and agile planning sessions as part of an iterative development process.
---
### mentorship-program-itbrainiacs-apex-edu-telenav-collaboration.md
__ITBrainiacs__ is a program developed by __Apex-Edu__ in collaboration with __Telenav__
, designed to identify talented students and help them reach their full potential in software engineering.
The program pairs selected high-potential students with experienced software engineers in a structured 6-month one-on-one mentorship initiative.
__Role & Contribution__
- Mentored students in software development fundamentals and best practices
- Provided guidance on problem-solving, coding standards, and software engineering principles
- Supported mentees through hands-on learning, feedback sessions, and continuous technical coaching
- Helped bridge academic knowledge with real-world software development practices
---
### paternity-leavecareer-break.md
Career break to focus on family.
“You have little kids for four years and if you miss it. It's done. That's it.” - Jordan Peterson
---
### quality-assurance-engineer-skobbler-acquired-by-telenav-inc.md
__QA / Mobile Testing Responsibilities__
- Performed testing across multiple handheld devices and platforms, including Android, iPhone, BlackBerry, and Nokia devices.
- Automated manual test cases for mobile platforms, primarily Android and iOS.
- Designed, created, and executed test cases for mobile applications and device-specific functionality.
- Built testing environments to simulate real-world usage scenarios and operating conditions.
- Collected diagnostic information and extracted relevant logs to investigate and troubleshoot issues identified during testing.
- Reported and tracked defects using Jira.
- Maintained and updated test cases based on evolving project requirements and test plans.
- Worked independently with minimal supervision while managing testing responsibilities and delivery timelines.
- Provided release assessments and quality sign-offs to support production deployments.
---
### senior-ios-developer-3pillar-global.md
While at 3Pillar Global I was part of a cross site team (Cluj, Timisoara and US) working on [__Geico__](https://www.geico.com "Geico")'s insurance mobile apps.
This was a complex and high-responsibility project involving sensitive data such as payments and personal user information, requiring strong focus on security, reliability, and compliance. I collaborated closely with distributed teams across multiple time zones to design, develop, and deliver features while maintaining consistent quality across releases.
---
### senior-ios-developer-neosteq.md
I was part of a smaller iOS engineering team working on a companion application for portable navigation devices (PNDs). Focused on real-time device communication, mapping features, and performance-critical mobile rendering.
__Contributions__
- Implemented communication between PND and iOS devices using Google Protocol Buffers for efficient data serialization.
- Developed Bluetooth-based communication channels between devices.
- Implemented and maintained In-App Purchase functionality.
- Integrated multiple web services into the mobile application.
- Implemented weather alert overlays on maps using OpenGL rendering.
---
### senior-software-engineer-contractor-flutter-entertainment.md
I joined Flutter Entertainment as a Contractor Senior Software Engineer, primarily working on iOS and frontend development.
__Contributions:__
- Assisted the iOS team in migrating parts of existing web-based iOS applications into native iOS code, including feature implementation and code reviews for other contracting teams.
- Migrated a large in-house frontend platform from AngularJS (Angular 1) to a modern ReactJS stack using Redux and React Hooks.
- Rebuilt the Help & Support static website and improved the static site generation pipeline for Betfair Support.
- Migrated Cash Card & Cash Card Plus frontend functionality to a new ReactJS-based frontend architecture.
- Added new features to existing Vue.js and AngularJS applications, including authentication and role-based access control using Microsoft Authentication Library (MSAL).
---
### senior-software-engineer-flutter-entertainment.md
__Contributions:__
- Led the complete rewrite of the in-house LivePerson JavaScript messenger library, improving architecture, maintainability, debugging capabilities, integration flexibility, and automated test coverage; successfully migrated the new implementation (v2) into production.
- Implemented the Help Knowledge Service, a semantic search platform built with Python and sentence transformers, including a two-step retrieval pipeline for intelligent article discovery and ranking, as well as ingestion pipelines that process Help & Support content and store vector embeddings in a vector database for semantic retrieval and contextual search capabilities.
- Contributed to the migration from on-premise infrastructure to AWS cloud environments using AWS CDK and Kubernetes (K8s).
---
### senior-software-engineer-telenav-inc.md
During my time at Telenav,
I worked primarily as an iOS developer on the Scout navigation client, with a strong focus on Objective-C development.
I led a team of five developers, providing technical leadership and mentorship, maintaining coding standards through code reviews and documentation, and participating in technical interviews and hiring processes.
My responsibilities included designing and implementing new features, improving application stability and performance, and collaborating closely with cross-functional teams to deliver navigation and location-based functionality.
From mid-2016, I transitioned into a new team focused on developing a cross-platform desktop application using Qt, C++, QML, and JavaScript.
---
### blitzer_de.md
## Context
While working at skobbler I had the opportunity to contribute to the Blitzer.de, the #1 speed cam application on the German App Store.
It uses skobbler's map technology stack alongside Blizer.de up to date speedcam database to inform the users of upcoming speedcams.
## Responsibilities
- iOS development as part of a team of 3 iOS developers
- synchronize data from Blitzer.de database
- C++ development, mainly integrating skobbler's C++ rendering engine for map display, and contributing to adapt it for our use case. There was no map SDK for plug and play integration.
---
### callsign.md
## Context
Callsign has built a secure mobile multi-factor authentication and authorisation engine, through the introduction of patented machine-learning biometric, behavioural, geo-location and identity analysis, combined with traditional methods.
## Responsibilities
- participate in Scrum meetings, and provide clear reports of the work progress
- lead the development efforts on creating the interface for their Ruleset Manager using React and D3.js. The final product can be seen in the showcase video.
- assist the team with code reviews
---
### creative-navy.md
## Context
Creative Navy is a London based design agency which focuses on user research, user experience design and UI design. Creative Navy ranked Top-5-global UX agencies from 2017 to 2019.
## Responsibilities
Create a new website from scratch following their designs.
Google audit score in the 90th percentile.
---
### elho.md
## Context
iPad app created for the Elho sales team to showcase all of Elho's products. Elho is a fast growing family company, specialized in plastic plant pots.
## Responsibilities
- iOS development
---
### forevermap.md
## Context
ForeverMap by Skobbler GmbH is an offline navigation application available for iOS (iPhone/iPod Touch/iPad). ForeverMap provides address/POI search, route calculation and Wikipedia information. OpenStreetMap Maps and POI data is the main source of information of this app.
## Responsibilities
- iOS development as part of a larger team
- code reviews, follow best practices
- participate in daily Scrum meetings
- provide mentorship to fellow collegues
---
### geobrain.md
## Context
GeoBrain is a interactive geo quiz game available on the iPhone and iPad. I was the only iOS developer working on the project.
Project included working with SQLite databases, networking, implementing game logic according to specified workflows, mixing OpenGL with UIKit elements.
## Responsibilities
- iOS development
- participate in daily Scrum meetings
---
### impetus.md
## Context
Impetus is a platform for reward based advertising and the cryptocurrency to run it. Meet Impetus One and the Nudge token. It’s where brands meet customers who actually want them in their lives.
Advertisers come up with and pay for brand missions consumers complete.
The fee is split between the customer, and the ad publisher where the customer joined the mission, with the smallest share for the platform.
Blockchain brings in low transaction fees, high velocity and geographically unbound means of currency distribution.
## Responsibilities
- ReactJS development
---
### next_nomads.md
## Context
NextNomads is designed to be a network of coworking spaces around the world, where freelancers, entrepreneurs and urban nomads can work whenever needed. The app lets users access the list of spaces via a map and shows the nearest offices and their amenities. It also gives access inside the offices, letting the users in via account token/wireless unlocking of the gates/doors.
## Responsibilities
- iOS development
- testing
- provide clear progress reports to the client
---
### scout_global.md
## Context
Scout is a map and navigation app for iOS devices (iPhone and iPad with cellular support) built on top of OpenStreetMap.
Features
- online and offline map
- shows traffic on the map with data by Inrix
- shows speed cameras that were reported on the german platform blitzer.de
## Responsibilities
- lead a team of 5 iOS developers
- iOS development
- mentorship
- code reviews, follow best practices
- participate in daily Scrum meetings
- maintain clear communication with the C++ team, QA Team and Project Management
---
### we_style.md
## Context
WeStyle is a social media application which offers instant style feedback plus discovery options that shift style uncertainty into total outfit confidence.
It alows the user to share his fashion style with a like minded community, and receive feedback.
## Responsibilities
- iOS development
- project managment
---
);
}
export default Image;
```
The [original 2018 version is also available as a Gist](https://gist.github.com/mihaiserban/751a84df361178db387e130d0c07693e).
> **Updated 2026-09-13:** The original example used `componentWillReceiveProps`, which is legacy React API. This version resets the image when `src` changes with an effect, and only attempts the fallback once.
---
### how-to-handle-aws-ses-bounces-and-complaints.md
If you’re thinking of implementing AWS Simple Email Service for your product, you might find out that you need a flow to handle email bounces and complaints before AWS approves your service quota increase and take your SES account out of sandbox mode.
> **Updated 2026-09-13:** This guide reflects the 2018 SNS identity-notification workflow. Current SES can also publish events through configuration sets. Notification settings are scoped to the SES Region and sending identity, so confirm both before using the console steps below. Production access still requires a process for handling bounces and complaints.
This requirement assures SES maintains a high reputation for only delivering mail people want and thereby maintaining a high deliverability for legitimate mail.
What exactly are email bounces and complaints?
**Bounce** email happens when an is returned to the sender because it cannot be delivered for some reason.
**Complaints** are reports made by email recipients against emails they don’t want in their inbox. Mark as SPAM for example triggers such a report. Email Service Providers (ESPs), have what is called a “feedback loop” with all of the major Internet Service Provides (ISPs).
In case your API receives a Bounce/Complaint you should take steps to make sure it doesn’t happen again. Easiest way is to not send emails to that user, unless he agrees to receive it.
#### Overview of the sending process
The following figure shows the process of sending an email via [AWS SES](http://aws.amazon.com/ses/).

If the sender request to SES succeds then it can expect one of the following outcomes:
* **success**
* **bounce**
* **complaint**
#### Overview of handling of bounce/complaints
The following figure shows the process of handling bounce/complaints by using [AWS SNS](https://aws.amazon.com/sns) service.

Bounce and complaint notifications are available by email or through Amazon Simple Notification Service (Amazon SNS). By default, these notifications are sent to you via email by a feature called _email feedback forwarding_.
#### 1. Setup AWS SNS topics for bounce and complaints
Create the following topics in [AWS SNS](https://docs.aws.amazon.com/sns/latest/dg/sns-http-https-endpoint-as-subscriber.html#SendMessageToHttp.prepare):
* ses-bounces-topic-prod
* ses-complaints-topic-prod
* ses-deliveries-topic-prod (optional)

After creating each topic, you’ll receive a identity id is called **ARN,** which we need in the next step of creating a SNS subscription.

Head to **SNS Subscriptions** and create a SNS subscription for the bounce and complaint topics you’ve previously created.
This is where we need to specify a Endpoint where we’ll receive notifications from each topic. Endpoint must be a **POST** method on your backend.

Each Subscription needs to be confirmed, after creation they are in a **PendingConfirmation** state.
To confirm our subscription, we need to implement the endpoints in our backend, and call Request confirmations from the SNS dashboard.
In the body received on our server we’ll find the SubscribeURL or Token which we can use to confirm.
Call sns.confirmSubscription() with the Token or copy pasting SubscribeURL into SNS Dashboard.

> **I’ve provided the code to subscribe and confirm each endpoint on** [**Github**](https://gist.github.com/mihaiserban/8a03fd28e54cac8856dbdfebd95bd7b3)**.**
> **TIP: Make sure your IAM User has access to SNS**
#### 2. Configure SES to publish notifications to each created SNS topic
In the 2018 SES console, go to **Email Addresses**, select the sending identity, open **Notifications**, and select the SNS topic for each notification type. In the current console, use the matching identity notification settings, or a configuration set when you need event publishing for a specific sending flow.

#### 3. Testing using [AWS Mailbox Simulator](https://aws.amazon.com/blogs/aws/mailbox-simulator-for-the-amazon-simple-email-service/)
The AWS mailbox simulator can be found in SES Managment Console and provides a way to test the way your implementation handles scenarios like bounces and complaints.

Mail sent to **success@simulator.amazonses.com** will be treated as delivered successfully.
Mail sent to **bounce@simulator.amazonses.com** will be rejected with an SMTP 550 (“Unknown User”) response code. Amazon SES will send you a bounce notification by email or by SNS notification.
Mail sent to **ooto@simulator.amazonses.com** will be treated as delivered successfully.
Mail sent to **complaint@simulator.amazonses.com** will simulate the case in which the recipient clicks **Mark as Spam** within their email application and the ISP sends a complaint response to Amazon SES.
Mail sent to **suppressionlist@simulator.amazonses.com** simulates a hard bounce as though the recipient were on the Amazon SES global suppression list.
---
### javascript-es6-cheatsheet-arrow-functions.md

Arrows are a function shorthand using the `=>` syntax. Arrow functions allow you to preserve the lexical value of `this`.
Take the example below where we have a nested function, in which we would like to preserve the context of `this` from its lexical scope:
```
function Person(name) {
this.name = name;
}
Person.prototype.prefixName = function (arr) {
return arr.map(function (character) {
return this.name + character; // Cannot read property 'name' of undefined
});
};
```
Using Arrow Functions, the lexical value of `this` isn't shadowed and we can re-write the above as shown:
```
function Person(name) {
this.name = name;
}
Person.prototype.prefixName = function (arr) {
return arr.map(character => this.name + character);
};
```
If an arrow is inside another function, it shares the `arguments` variable of its parent function. Example:
```
// Lexical arguments
function square() {
let example = () => {
let numbers = [];
for (let number of arguments) {
numbers.push(number * number);
}
return numbers;
};
return example();
}
square(2, 4, 7.5, 8, 11.5, 21); // returns: [4, 16, 56.25, 64, 132.25, 441]
```
You can find a more complete ES6 cheetsheet on my [Github](https://github.com/mihaiserban/es6-cheetsheet/blob/master/README.md) page.
---
### javascript-es6-cheatsheet-async-await.md

* Async/await was standardized in ES2017. Previous options for asynchronous code are callbacks and promises.
* Async/await is built on top of promises. It cannot be used with plain callbacks or node callbacks.
* Async/await makes asynchronous code look and behave a little more like synchronous code.
In a regular script, `await` may only be used in functions marked with the `async` keyword. ECMAScript modules can also use top-level `await`. It suspends execution in its context until the promise settles. If the awaited expression isn’t a promise, it is converted to one.
`async await` allows us to perform the same thing we accomplished using Generators and Promises with less effort:
```
async function getJSON(url) {
const response = await fetch(url);
if (!response.ok) {
throw new Error(`Request failed: ${response.status}`);
}
return response.json();
}
async function main() {
try {
const data = await getJSON('https://api.example.com/data');
console.log(data);
} catch (error) {
console.error(error);
}
}
main();
```
Under the hood, it performs similarly to [Generators](https://medium.com/@serbanmihai/javascript-es6-cheatsheet-generators-997cc977f7f1).
> **Updated 2026-09-13:** The original callback wrapper depended on the now-deprecated `request` package, ignored errors, and called `getJSON` without a URL. The example now uses `fetch`, available in modern browsers and Node.js 18+.
---
### javascript-es6-cheatsheet-classes.md

Prior to ES6, we implemented Classes by creating a constructor function and adding properties by extending the prototype:
```
function Person(name, age, gender) {
this.name = name;
this.age = age;
this.gender = gender;
}
Person.prototype.incrementAge = function () {
return this.age += 1;
};
```
And created extended classes by the following:
```
function Personal(name, age, gender, occupation, hobby) {
Person.call(this, name, age, gender);
this.occupation = occupation;
this.hobby = hobby;
}
Personal.prototype = Object.create(Person.prototype);
Personal.prototype.constructor = Personal;
Personal.prototype.incrementAge = function () {
Person.prototype.incrementAge.call(this);
this.age += 20;
console.log(this.age);
};
```
ES6 classes are a simple sugar over the prototype-based OO pattern. Classes support prototype-based inheritance, super calls, instance and static methods and constructors:
```
class Person {
constructor(name, age, gender) {
this.name = name;
this.age = age;
this.gender = gender;
}
incrementAge() {
this.age += 1;
}
}
```
And extend them using the `extends` keyword:
```
class Personal extends Person {
constructor(name, age, gender, occupation, hobby) {
super(name, age, gender);
this.occupation = occupation;
this.hobby = hobby;
}
incrementAge() {
super.incrementAge();
this.age += 20;
console.log(this.age);
}
}
```
You can find a more complete ES6 cheetsheet on my [Github](https://github.com/mihaiserban/es6-cheetsheet/blob/master/README.md) page.
---
### javascript-es6-cheatsheet-destructuring.md

### Destructuring
Destructuring is a convenient way of extracting multiple values from data stored in (possibly nested) objects and Arrays.
### Array
Destructuring assignment allows you to assign the properties of an array using syntax that looks similar to array literals.
Old way:
```
var first = someArray[0];
var second = someArray[1];
var third = someArray[2];
```
New way:
```
let [first, second, third] = someArray;
```
If you want to declare your variables at the same time, you can add a `var`, `let`, or `const` in front of the assignment.
```
var [ variable1, variable2, ..., variableN ] = array;
let [ variable1, variable2, ..., variableN ] = array;
const [ variable1, variable2, ..., variableN ] = array;
```
We can even skip a few variables:
```
let [,,third] = ["foo", "bar", "baz"];
console.log(third); // "baz"
```
There’s also no need to match the full array:
```
let array = [1, 2, 3, 4];
let [a, b, c] = array;
console.log(a, b, c) // -------- 1 2 3
```
You can capture all trailing items in an array with a “rest” pattern:
```
const array = [1, 2, 3, 4];
const [head, ...tail] = array;
console.log(head); // 1
console.log(tail); // [2, 3, 4]
```
Rest parameter must be applied as the last element, otherwise you’ll get a `SyntaxError`.
```
let array = [1, 2, 3, 4];
let [...head, d] = array;
// Uncaught SyntaxError: Unexpected token...
```
### Object
Old way of destructuring an object:
```
var person = { first_name: 'Joe', last_name: 'Appleseed' };
var first_name = person.first_name; // 'Joe'
var last_name = person.last_name; // 'Appleseed'
```
New way of destructuring an object:
```
let person = { first_name: 'Joe', last_name: 'Appleseed' };
let {first_name, last_name} = person;
console.log(first_name); // 'Joe'
console.log(last_name); // 'Appleseed'
```
When you destructure on properties that are not defined, you get undefined:
```
let { missing } = {};
console.log(missing); // undefined
```
You can also destructure in a for-of loop:
```
const arr = ['a', 'b'];
for (const [index, element] of arr.entries()) {
console.log(index, element);
}
// Output:
// 0 a
// 1 b
```
Object rest properties were standardized in ES2018. If you support older runtimes, transpile this syntax.
```
let object = {
a: 'A',
b: 'B',
c: 'C',
d: 'D',
}
const { a, b, ...other } = object;
console.log(other); // {c: 'C', d: 'D'}
```
---
### javascript-es6-cheatsheet-generators.md

A `generator` is a function which can be exited and later re-entered. Their context (variable bindings) will be saved across re-entrances.
Generators in JavaScript are a very powerful tool for asynchronous programming as they mitigate the problems with callbacks, such as `Callback Hell` and `Inversion of Control`.
This pattern is what `async` functions are built on top of.
For creating a generator function, we use `function *` syntax instead of just `function`.
Calling a generator function does not execute its body immediately; an iterator object for the function is returned instead. When the iterator’s `next()` method is called, the generator function's body is executed until the first `yield` expression, which specifies the value to be returned from the iterator or, with `yield*`, delegates to another generator function.
The `next()` method returns an object with a value property containing the yielded value and a done property which indicates whether the generator has yielded its last value as a boolean. Calling the `next()` method with an argument will resume the generator function execution, replacing the yield expression where execution was paused with the argument from `next()`.
**Simple example:**
```
function* generator(i) {
yield i;
yield i + 10;
}
var gen = generator(10);
console.log(gen.next().value);// expected output: 10
console.log(gen.next().value); // expected output: 20
```
**Example with yield\*:**
```
function* anotherGenerator(i) {
yield i + 1;
yield i + 2;
yield i + 3;
}
function* generator(i) {
yield i;
yield* anotherGenerator(i);
yield i + 10;
}
var gen = generator(10);
console.log(gen.next().value); // 10
console.log(gen.next().value); // 11
console.log(gen.next().value); // 12
console.log(gen.next().value); // 13
console.log(gen.next().value); // 20
```
**Infinite Data generator example:**
```
function * naturalNumbers() {
let num = 1;
while (true) {
yield num;
num = num + 1
}
}
const numbers = naturalNumbers();
console.log(numbers.next().value) // 1
console.log(numbers.next().value) // 2
```
You can find a more complete ES6 cheetsheet on my [Github](https://github.com/mihaiserban/es6-cheetsheet/blob/master/README.md) page.
---
### javascript-es6-cheatsheet-getter-and-setter-functions.md

ES6 has started supporting getter and setter functions within classes. Using the following example:
```
class Person {
constructor(name) {
this._name = name;
}
get name() {
if(this._name) {
return this._name.toUpperCase();
} else {
return undefined;
}
}
set name(newName) {
if (newName == this._name) {
console.log('I already have this name.');
} else if (newName) {
this._name = newName;
} else {
return false;
}
}
}
let person = new Person("John Doe");
// uses the get method in the background
if (person.name) {
console.log(person.name); // JOHN DOE
}
// uses the setter in the background
person.name = "Jane Doe";
console.log(person.name); // JANE DOE
```
---
### javascript-es6-cheatsheet-helpful-array-functions.md

`**from**`
```
const inventory = [
{name: 'mars', quantity: 2},
{name: 'snickers', quantity: 3}
];
console.log(Array.from(inventory, item => item.quantity + 2)); // [4, 5]
```
`**of**`
```
Array.of("Twinkle", "Little", "Star"); // returns ["Twinkle", "Little", "Star"]
```
`**find**`
```
const inventory = [
{name: 'mars', quantity: 2},
{name: 'snickers', quantity: 3}
];
console.log(inventory.find(item => item.name === 'mars')); // {name: 'mars', quantity: 2}
```
`**findIndex**`
```
const inventory = [
{name: 'mars', quantity: 2},
{name: 'snickers', quantity: 3}
];
console.log(inventory.findIndex(item => item.name === 'mars')); // 0
```
`**fill**` method takes up to three arguments value, start and end. The start and end arguments are optional with default values of 0 and the length of the this object.
```
[1, 2, 3].fill(1); // [1, 1, 1]
[1, 2, 3].fill(4, 1, 2); // [1, 4, 3]
```
You can find a more complete ES6 cheetsheet on my [Github](https://github.com/mihaiserban/es6-cheetsheet/blob/master/README.md) page.
---
### javascript-es6-cheatsheet-helpful-string-functions.md

### .includes( )
```
var string = 'string';
var substring = 'str';
console.log(string.indexOf(substring) > -1);
```
Instead of checking for a return value `> -1` to denote string containment, we can simply use `.includes()` which will return a boolean:
```
const string = 'string';
const substring = 'str';
console.log(string.includes(substring)); // true
```
### .repeat( )
```
function repeat(string, count) {
var strings = [];
while(strings.length < count) {
strings.push(string);
}
return strings.join('');
}
```
In ES6, we now have access to a nicer implementation:
```
// String.repeat(numberOfRepetitions)
'str'.repeat(3); // 'strstrstr'
```
You can find a more complete ES6 cheetsheet on my [Github](https://github.com/mihaiserban/es6-cheetsheet/blob/master/README.md) page.
---
### javascript-es6-cheatsheet-map-weakmap.md

### Map
A `Map` is a data structure allows to associate data to a key.
Before it’s intruduction in ES6, people generally used objects as maps, by associating some object or value to a specific key value:
```
const person = {}
person.name = 'John'
person.age = 18
console.log(person.name) //John
console.log(person.age) //18
```
`Map` example:
```
const person = new Map()
person.set('name', 'John')
person.set('age', 18)
const name = person.get('name')
const age = person.get('age')
console.log(name) //John
console.log(age) //18
```
The `Map` also provide us with methods to help us manage the data.
`delete()` method - deletes an item from a map by key:
```
person.delete('name')
```
`clear()` method - delete all items from a map:
```
person.clear()
```
`has()` method - check if a map contains an item by key:
```
const hasName = person.has('name')
```
`size()` method - check the number of items in a map:
```
const size = person.size
```
We can also use a couple of methods to iterate:
`entries()` returns all entries.
`keys()` returns all keys.
`values()` returns all values.
Find more details about `Map` [**here**](https://developer.mozilla.org/en-US/docs/Web/JavaScript/Reference/Global_Objects/Map)
### WeakMap
A `WeakMap` is a special kind of map.
In a `Map`, items are never garbage collected. A `WeakMap` instead lets all its items be freely garbage collected. Every key of a `WeakMap` is an object. When the reference to this object is lost, the value can be garbage collected.
Main differences between `WeakMap` and `Map`:
* you cannot iterate over the keys or values (or key-values) of a WeakMap
* you cannot clear all items from a WeakMap
* you cannot check its size
A WeakMap exposes those methods, which are equivalent to the Map ones:
```
get(k)
set(k, v)
has(k)
delete(k)
```
The use cases of a `WeakMap` are less evident than the ones of a `Map`, and you might never find the need for them, but essentially it can be used to build a memory-sensitive cache that is not going to interfere with garbage collection, or for careful encapsualtion and information hiding.
Find more details about `WeakMap` [**here**](https://developer.mozilla.org/en-US/docs/Web/JavaScript/Reference/Global_Objects/WeakMap).
You can find a more complete ES6 cheetsheet on my [Github](https://github.com/mihaiserban/es6-cheetsheet/blob/master/README.md) page.
---
### javascript-es6-cheatsheet-modules.md

Prior to ES6, we used libraries such as [Browserify](http://browserify.org/) to create modules on the client-side, and [require](https://nodejs.org/api/modules.html#modules_module_require_id) in **Node.js**. ES modules provide a separate, standard module system built around `import` and `export`; CommonJS and AMD code need a compatible runtime, bundler, or migration layer.
### Exporting in CommonJS
```
module.exports = 1;
module.exports = { foo: 'bar' };
module.exports = ['foo', 'bar'];
module.exports = function bar () {};
```
### Exporting in ES6
**Named Exports:**
```
export function multiply (x, y) {
return x * y;
};
```
As well as **exporting a list** of objects:
```
function add (x, y) {
return x + y;
};
function multiply (x, y) {
return x * y;
};
export { add, multiply };
```
**Default export:**
In our module, we can have many named exports, but we can also have a default export. It’s because our module could be a large library and with default export we can import then an entire module.
Important to note that there’s only `one default export per module`.
```
export default function (x, y) {
return x * y;
};
```
This time we don’t have to use curly braces for importing and we have a chance to name imported statement as we wish.
```
import multiply from 'module';
// === OR ===
import whatever from 'module';
```
A module can have both named exports and a default export:
```
// module.js
export function add (x, y) {
return x + y;
};
export default function (x, y) {
return x * y;
};
// app.js
import multiply, { add } from 'module';
```
The default export is just a named export with the special name default.
```
// module.js
export default function (x, y) {
return x * y;
};
// app.js
import multiply from 'module';
```
### Importing in ES6
```
import { add } from 'module';
```
We can even import many statements:
```
import { add, multiply } from 'module';
```
Imports may also be **aliased**:
```
import {
add as addition,
multiply as multiplication
} from 'module';
```
and use wildcard (`*`) to import all exported statemets:
```
import * as module from 'module';
```
---
### javascript-es6-cheatsheet-promises.md

Promises are one of the most exciting additions to JavaScript ES6. Promises are a pattern that greatly simplifies asynchronous programming by making the code look synchronous and avoid problems associated with callbacks.
Prior to ES6, we used [bluebird](https://github.com/petkaantonov/bluebird) or [Q](https://github.com/kriskowal/q). Now we have Promises natively.
`A Promise is an object that is used as a placeholder for the eventual results of a deferred (and possibly asynchronous) computation.`
The `resolve` and `reject` are functions themselves and are used to send back values to the promise object.
```
const myPromise = new Promise((resolve, reject) => {
if (Math.random() * 100 <= 90) {
resolve('Hello, Promises!');
}
reject(new Error('In 10% of the cases, I fail. Miserably.'));
});
myPromise.then((resolvedValue) => {
console.log(resolvedValue); //Hello, Promises!
}, (error) => {
console.log(error); //In 10% of the cases, I fail. Miserably.
});
```
**Chaining Promises:**
Promises allow us to turn our horizontal code (callback hell):
```
func1(function (value1) {
func2(value1, function (value2) {
func3(value2, function (value3) {
// Do something with value 3
});
});
});
```
Into vertical code like so:
```
func1(value1)
.then(func2)
.then(func3)
.then(value3 => {
// Do something with value 3
})
.catch(error => {
// Handle an error from any step
});
```
**Parallelize Promises:**
We can use `Promise.all()` to handle an array of asynchronous operations.
```
let urls = [
'/api/commits',
'/api/issues/opened',
'/api/issues/assigned',
'/api/issues/completed',
'/api/issues/comments',
'/api/pullrequests'
];
let promises = urls.map((url) => {
return new Promise((resolve, reject) => {
$.ajax({ url: url })
.done((data) => {
resolve(data);
});
});
});
Promise.all(promises)
.then((results) => {
// Do something with results of all our promises
});
```
---
### javascript-es6-cheatsheet-set-weakset.md

A `Set` is a collection for unique values. The values can be primitives or object references.
```
let set = new Set();
set.add(1);
set.add('1');
set.add({ key: 'value' });
console.log(set); // Set {1, '1', Object {key: 'value'}}
```
Most importantly is that it does not allow duplicate values, one good use if to remove duplicate values from an array:
```
[ ...new Set([1, 2, 3, 1, 2, 3]) ] //[1, 2, 3]
```
Iteration using built-in method forEach and for..of:
```
// forEach
let set = new Set([1, '1', { key: 'value' }]);
set.forEach(function (value) {
console.log(value);
// 1
// '1'
// Object {key: 'value'}
});
// for..of
let set = new Set([1, '1', { key: 'value' }]);
for (let value of set) {
console.log(value);
// 1
// '1'
// Object {key: 'value'}
};
```
Similar to `Map`, `Set` provides us with methods such as `has()`, `delete()`, `clear()`.
Find more details about `Set` [**here**](https://developer.mozilla.org/en-US/docs/Web/JavaScript/Reference/Global_Objects/Set)
### WeakSet
Like a `WeakMap`, `WeakSet` is a `Set` that doesn’t prevent its values from being garbage-collected. It has simpler API than `WeakMap`, because has only three methods:
```
new WeakSet([iterable])
WeakSet.prototype.add(value) : any
WeakSet.prototype.has(value) : boolean
WeakSet.prototype.delete(value) : boolean
```
Important thing to note `WeakSet` is a collection that can‘t be iterated and whose size cannot be determined.
Find more details about `WeakSet` [**here**](https://developer.mozilla.org/en-US/docs/Web/JavaScript/Reference/Global_Objects/WeakSet)
You can find a more complete ES6 cheetsheet on my [Github](https://github.com/mihaiserban/es6-cheetsheet/blob/master/README.md) page.
---
### javascript-es6-cheatsheet-spread-operator.md

### Spread Operator
The spread syntax is simply three dots: `...` It allows an iterable to expand in places where 0+ arguments are expected.
### Calling Functions without Apply:
```
function doStuff (x, y, z) { }
var args = [0, 1, 2];
// Call the function, passing args
doStuff.apply(null, args);
doStuff(...args);
```
Using spread operator:
```
const arr = [2, 4, 8, 6, 0];
const max = Math.max(...arr);
console.log(max); //8
```
Or another example using Math functions:
```
let mid = [3, 4];
let arr = [1, 2, ...mid, 5, 6]; //[1, 2, 3, 4, 5, 6]
```
### Combine arrays
```
let arr = [1,2,3];
let arr2 = [...arr]; // like arr.slice()
arr2.push(4)
```
You can find a more complete ES6 cheetsheet on my [Github](https://github.com/mihaiserban/es6-cheetsheet/blob/master/README.md) page.
---
### javascript-es6-cheatsheet-string-templates.md

Template Strings use back-ticks (\`\`) rather than the single or double quotes we’re used to with regular strings. A template string could thus be written as follows:
```
const greeting = `Yo World!`;
```
**String Substitution**:
Substitution allows us to place any valid JavaScript expression inside a Template Literal, the result will be output as part of the same string.
Template Strings can contain placeholders for string substitution using the ${ } syntax:
```
var name = "Brendan";
console.log(`Yo, ${name}!`); //"Yo, Brendan!"
```
We can use expression interpolation to embed for some readable inline math:
```
var a = 10;
var b = 10;
console.log(`${a+b}`); //20
```
They are also very useful for functions inside expressions:
```
function fn() { return "inside fn"; }
console.log(`outside, ${fn()}, outside`); // outside, inside fn, outside.
```
__Multiline Strings:__
Multiline strings in JavaScript have required hacky workarounds for some time. Template Strings significantly simplify multiline strings. Simply include newlines where they are needed and BOOM.
```
let text = `In ES5 this is
not legal.`
```
__Unescaped template strings:__
We can now construct strings that have special characters in them without needing to escape them explicitly.
```
var escapedText = "This string contains \"double quotes\" which are escaped.";
let templateText = `This string contains "double quotes" which don't need to be escaped anymore.`;
```
---
### javascript-es6-cheatsheet-variable-declarations.md

ES6 brought `let` and `const` with proper lexical scoping. `let` is the new `var`. Constants work just like `let`, but can’t be reassigned. `let` and `const` are block scoped. Therefore, referencing block-scoped identifiers before they are defined will produce a `ReferenceError`.
Example using `var`:
```
var variable = 5;
{
console.log('inside', variable); //5
var variable = 10;
}
console.log('outside', variable); //10
```
Example using `const`:
```
const variable = 5;
variable = variable*2; // TypeError: Attempted to assign to readonly property.
```
Constants are tricky with array and objects. The `reference` becomes constant but the value does not.
```
const variable = [5];
console.log(variable) // [5]
variable = [2]; //TypeError: Attempted to assign to readonly property.
variable[0] = 1;
console.log(variable) // [1]
```
You can find a more complete ES6 cheetsheet on my [Github](https://github.com/mihaiserban/es6-cheetsheet/blob/master/README.md) page.
---
### neural-llm-router-coding-assistant.md
I run an AI gateway that sits between my coding agents and a pool of LLM providers. The gateway handles health checks, failover, and model resolution. But it had one blind spot: it never looked at the *content* of what I was asking.
Every request was routed based on whatever model the agent picked. If opencode chose `coder`, the gateway used that pool. That leaves the gateway unable to distinguish an exploration request such as "search the codebase for User model references" from a request that needs a stronger coding model.
So I built a neural router that reads the *first user message* and classifies it into one of four task types: **explore**, **plan**, **build**, or **quick**. The task type selects a model pool and a configured reasoning effort. The classifier is a 7,168-weight linear head on top of Qwen3-0.6B.
---
## The architecture
The router is a sidecar service. The gateway calls it over HTTP, falls back to the default model if it's unreachable, and opens a circuit breaker after the first failure.
```text
openCode/Codex → gateway :4100 → router sidecar :5560 → Qwen3-0.6B → head → {task,reasoning}
│
└─ (fallback) config.default_model
```
The head is inspired by [TRINITY](https://arxiv.org/abs/2512.04695) (Xu et al., ICLR 2026), but it is a smaller custom adaptation. It is one weight matrix, `W ∈ R^{7×1024}`, with no bias or activation: 7,168 weights in total. Seven logits split into two softmax groups:
| Group | Dimensions | Outputs |
|---|---|---|
| Task type | 4 logits | explore, plan, build, quick |
| Reasoning effort | 3 logits | low, medium, high |
TRINITY uses a different coordinator head with model-selection and role logits, and tunes additional backbone parameters. This router instead uses a fixed Qwen3-0.6B encoder and the 7-way head above. At inference, it mean-pools the final-layer token states into a 1024-dimensional, L2-normalized vector and multiplies it by the head. The task output maps into the gateway's routing config:
```yaml
task_to_combo:
explore: explorer # exploration pool
plan: planner # planning pool
build: coder # coding pool
quick: coder-fast # short-request pool
task_to_reasoning:
explore: low
plan: high
build: high
quick: low
```
---
## Training data came from my own sessions
I did not collect a separate dataset. opencode stores sessions in a SQLite database at `~/.local/share/opencode/opencode.db`. Each session has an `agent` field, which I used as a weak task-type label:
```sql
SELECT s.agent, s.model, p.data
FROM session s
JOIN message m ON m.session_id = s.id
JOIN part p ON p.message_id = m.id
WHERE s.agent IN ('build', 'plan', 'explore', 'librarian', 'general')
AND json_extract(m.data, '$.role') = 'user'
AND json_extract(p.data, '$.type') = 'text'
```
The `agent` field was my label. I mapped it as follows:
| opencode agent | Task type | Labeled rows |
|---|---|---|
| explore, librarian | explore | 53 |
| plan | plan | 192 |
| build | build | 383 |
| build (commit, bash, git, etc.) | quick | 181 |
The `quick` split is heuristic: build messages containing terms such as "commit", "git push", "bash", or "run" were relabeled quick. These category counts total 809. The query can return multiple text parts per session, so a session-level evaluation needs an explicit selection rule and a split that keeps each session's examples together.
---
## A local training run
In one local run, penultimate-token encoding with SGD reached 47.5% task accuracy. Its hidden-state cosine similarities were 0.3–0.5 both within and between these labels, so that representation did not separate the classes well in this dataset.
I changed pooling and optimization for the next run:
**Mean pooling instead of the penultimate token.** A penultimate hidden state can attend across the sequence; it is not a representation of only the last word. I switched to averaging token states for single-message classification. TRINITY's use of a penultimate state addresses a different coordinator design and input setting.
**Adam with class-weighted loss.** The build class dominated (383 rows versus 53 explore rows). I used inverse-frequency class weights and Adam at `lr=0.001`:
| Epoch | Task accuracy | Reasoning accuracy | Loss |
|---|---|---|---|
| 20 | 67.3% | 86.4% | 1.47 |
| 100 | 73.3% | 88.9% | 0.92 |
| 200 | 78.6% | 91.2% | 0.73 |
Treat these as training-run metrics: the figures here do not include a held-out split, seed, repeat count or software versions. They also do not isolate the effect of pooling from the optimizer change. The reasoning labels come from the fixed task-to-reasoning mapping, so their accuracy mainly checks whether the head reproduced that derived label.
---
## Inference on Apple Silicon
Qwen3-0.6B runs on MPS. This simplified FastAPI response shape shows the head outputs:
```python
@app.post("/route")
async def route(req: RouteRequest) -> RouteResponse:
h = encoder.encode_mean_pool(req.transcript)
task_type, reasoning, debug = head.select(torch.as_tensor(h))
return RouteResponse(
task_type=task_type.value,
reasoning_effort=reasoning.value,
)
```
The snippet returns the raw head prediction. It does not show which value the gateway ultimately applies when that prediction conflicts with the configuration.
In the recorded M3 Max run, latency was **96ms warm and 624ms cold start**. The head weights file is 30KB. These measurements are local observations, not a benchmark across machines or workloads.
Task-head predictions from the recorded sample:
```
"Search the codebase for User model" → explore (70.4%)
"Write a function to parse markdown" → build (68.5%)
"Commit changes with fix message" → quick (66.2%)
"Design a real-time chat architecture"→ build (40.3%)
```
The raw reasoning output for the commit example was `high (51.0%)`, while the shown configuration maps `quick` to `low`. That disagreement needs a defined precedence rule at the gateway. The snippets here do not establish which value it ultimately applies, so the sample table reports only task predictions.
The plan/build boundary was the hardest in this label set: "design system architecture" and "write a function" share structured, code-related vocabulary. I currently map uncertain coding requests to build, but that is a routing policy choice, not evidence that it is optimal.
---
## What's next
**Deployment-level optimization.** Right now the router picks a combo bucket. A future version could score deployments within a bucket using health, latency, price, and task success. TRINITY uses sep-CMA-ES to optimize its coordinator under an evaluation budget. A score such as `quality - λ × cost` would be my own proposed objective and would need comparable-task measurements before I could use it to choose providers.
**Self-improving C-A-F loop.** [Agent-as-a-Router](https://arxiv.org/abs/2606.22902) describes a Context-Action-Feedback loop with routing, verification, and memory components. My gateway already logs usage events to Postgres, including token counts, latency, served deployment, and cache hits. A verifier and a history of routing decisions would make it possible to evaluate an online-learning extension; they would not by themselves establish that it improves routing.
**Avoiding routing collapse.** In their experiments, [When Routing Collapses](https://arxiv.org/abs/2602.03478) describes routers increasingly selecting expensive models as the cost budget rises and proposes ranking-based EquiRouter. I would evaluate a ranking approach when this router moves to deployment-level routing.
---
## Current scope
This 7,168-weight head uses a local, weakly labeled dataset to select a task pool for coding requests. The recorded warm latency was under 100ms on one M3 Max machine. It still needs a documented split, baseline, repeated evaluation, and cost per successfully completed comparable task before it can support a claim about accuracy beyond the training run or about savings. If the router is unavailable, the gateway falls back to its configured default.
---
### neural-router-assembly-reconstruction.md
I run an AI gateway between my coding agents and a pool of LLM providers. It handles health checks, failover, and model resolution, but it does not inspect the content of a request before choosing a routing pool.
I built a neural router that reads the first user message and classifies it as **explore**, **plan**, **build**, or **quick**. The task type selects a model pool and configured reasoning effort. The classifier is a 7,168-weight linear head on top of Qwen3-0.6B.
## The architecture
The router is a sidecar service. The gateway calls it over HTTP, falls back to its configured default if the router is unavailable, and opens a circuit breaker after the first failure.
The head is inspired by [TRINITY](https://arxiv.org/abs/2512.04695), but it is a custom adaptation. It is one weight matrix, `W ∈ R^{7×1024}`, with no bias or activation: 7,168 weights. Seven logits split into four task logits and three reasoning-effort logits.
TRINITY uses a different coordinator head with model-selection and role logits, and tunes additional backbone parameters. This router uses a fixed Qwen3-0.6B encoder and the 7-way head above. It mean-pools the final-layer token states into a 1024-dimensional, L2-normalized vector and multiplies it by the head.
```yaml
task_to_combo:
explore: explorer # exploration pool
plan: planner # planning pool
build: coder # coding pool
quick: coder-fast # short-request pool
task_to_reasoning:
explore: low
plan: high
build: high
quick: low
```
## Training data from my sessions
opencode stores sessions in a SQLite database. Each session has an `agent` field, which I used as a weak task-type label. I mapped the existing labels to four task types. The `quick` category was derived heuristically from build messages containing terms such as "commit", "git push", "bash", or "run".
| opencode agent | Task type | Labeled rows |
|---|---|---|
| explore, librarian | explore | 53 |
| plan | plan | 192 |
| build | build | 383 |
| build (commit, bash, git, etc.) | quick | 181 |
These category counts total 809. The source query can return multiple text parts per session, so a session-level evaluation needs an explicit selection rule and a split that keeps each session's examples together.
## A local training run
In one local run, penultimate-token encoding with SGD reached 47.5% task accuracy. Its hidden-state cosine similarities were 0.3 to 0.5 both within and between these labels, so that representation did not separate the classes well in this dataset.
I changed pooling and optimization for the next run. A penultimate hidden state can attend across the sequence; it is not a representation of only the last word. TRINITY's use of a penultimate state addresses a different coordinator design and input setting. The reported figures do not isolate the contribution of pooling from the optimizer change.
The build class dominated, with 383 rows versus 53 explore rows. I used inverse-frequency class weights and Adam at `lr=0.001`; the epoch-200 training metrics were 78.6% task accuracy, 91.2% reasoning accuracy, and 0.73 loss.
Treat these as training-run metrics. The figures here do not include a held-out split, seed, repeat count, or software versions. They also do not isolate pooling from the optimizer change. The reasoning labels come from the fixed task-to-reasoning mapping, so their accuracy mainly checks whether the head reproduced that derived label.
## Inference on Apple Silicon
Qwen3-0.6B runs on MPS. In a recorded M3 Max run, latency was **96ms warm and 624ms cold start**. The head weights file is 30KB. These are local observations, not a benchmark across machines or workloads.
Task-head predictions from the recorded sample:
```text
"Search the codebase for User model" → explore (70.4%)
"Write a function to parse markdown" → build (68.5%)
"Commit changes with fix message" → quick (66.2%)
"Design a real-time chat architecture" → build (40.3%)
```
The raw reasoning output for the commit example was `high (51.0%)`, while the configuration maps `quick` to `low`. The post does not document how that conflict is handled, so the sample reports task predictions only.
The plan/build boundary was the hardest in this label set. I currently map uncertain coding requests to build, but that is a routing-policy choice, not evidence that it is optimal.
## What's next
**Deployment-level optimization.** The router currently picks a model pool. A future version could score deployments within a pool using health, latency, price, and task success. TRINITY uses sep-CMA-ES to optimize its coordinator under an evaluation budget. A score such as `quality - λ × cost` would be my proposed objective and would need comparable-task measurements before provider selection could rely on it.
**Self-improving C-A-F loop.** [Agent-as-a-Router](https://arxiv.org/abs/2606.22902) describes a Context-Action-Feedback loop with routing, verification, and memory components. My gateway logs usage events to Postgres, including token counts, latency, served deployment, and cache hits. A verifier and a history of routing decisions would make an online-learning extension possible to evaluate; they would not by themselves establish an improvement.
**Avoiding routing collapse.** In their experiments, [When Routing Collapses](https://arxiv.org/abs/2602.03478) describes routers increasingly selecting expensive models as the cost budget rises and proposes ranking-based EquiRouter. I would evaluate a ranking approach when this router moves to deployment-level routing.
This 7,168-weight head uses a local, weakly labeled dataset to select a task pool. It needs a documented split, baseline, repeated evaluation, and cost per successfully completed comparable task before it can support a claim about savings.
---
### replacing-orchestrator-agents-with-governance-worker-synthesis.md
My coding agents previously kept planning, worker results, and synthesis in one orchestrator conversation. On a multi-file refactor, three worker results accumulated in that conversation before the final response. It was difficult to inspect the handoffs or give synthesis a focused input.
That is a constraint of this workflow, not a verdict on every orchestrator design. A coordinator can still be useful for planning and recovery. I changed where it keeps detailed worker output and how synthesis starts.
## The three-stage workflow I implemented
I use three stages backed by filesystem state: governance, a variable number of workers, and synthesis.
```
User → Governance (plans, writes task specs to .agent-state/tasks/*.yaml)
│
│ spawns workers with: "Read task spec. Write result to file. Confirm."
▼
┌──────────┐ ┌──────────┐ ┌──────────┐
│ Worker 1 │ │ Worker 2 │ │ Worker N │ ← fresh contexts
└────┬─────┘ └────┬─────┘ └────┬─────┘
│ │ │
▼ ▼ ▼ (writes to disk, returns short confirmation)
.agent-state/results/*.yaml ← shared filesystem state
│
▼
Synthesis agent (fresh context, reads result files, produces final answer)
│
▼
User ← clean, focused output
```
I configure governance to plan, write task specifications, and delegate rather than perform the assigned unit of work or synthesize the final response. Each worker receives a task-spec path and result path. Workers write structured results to YAML and return a short confirmation. When the fanout finishes, a fresh synthesis agent reads the result files and produces the final response. This separation is a workflow convention; it needs tool permissions if governance must be technically prevented from editing project files.
An illustrative task specification:
```yaml
# .agent-state/tasks/analyze-auth.yaml
goal: audit the authentication module for security issues
constraints: do not modify the database schema
expected_output_path: .agent-state/results/analyze-auth.yaml
context_files: [src/auth/middleware.ts, src/auth/session.ts]
blocked_on: null
```
An illustrative result schema:
```yaml
# .agent-state/results/analyze-auth.yaml
status: ok
summary: example findings from a security review
findings:
- severity: critical
summary: example review finding
files_changed: []
blockers: []
verification_gaps:
- could not verify third-party OAuth callback flow end-to-end
```
The plugin I wrote, replacing the old orchestrator-minion watchdog, adds two capabilities beyond inactivity detection:
1. **Fanout completion tracking**: when all workers for a fanout are done, the plugin nudges governance to start synthesis.
2. **Path-aware recovery**: when a worker stalls, the recovery prompt includes the task-spec and expected-result paths, so governance can inspect the state before deciding whether to wait, re-brief, or report a blocker.
```text
A watched worker may be inactive.
Task spec: .agent-state/tasks/analyze-auth.yaml
Expected result: .agent-state/results/analyze-auth.yaml
Inspect the child session, then decide: wait, re-brief, or report a blocker.
```
## What the workflow changes
For a multi-file refactor, the intended differences are:
| | Before (orchestrator-minion) | After (governance-worker-synthesis) |
|---|---|---|
| Governance context | Detailed worker results in the same conversation | Worker confirmations and paths |
| Handoff format | Natural language summaries | Structured YAML on disk |
| Synthesis context | Same orchestrator conversation | Fresh context reading result files |
| Stale worker recovery | Session-only prompt | Task-spec and result paths included |
The synthesis stage receives finished result files rather than governance discussion, worker chatter, and recovery prompts. That makes its input easier to inspect and reproduce. These workflow differences do not establish a quality improvement; that would require a controlled comparison on similar tasks.
## Why I chose this structure
**[ExtAgents](https://arxiv.org/abs/2505.21471)** found benefits from distributing external knowledge across agents for its multi-hop question-answering and long-survey tasks. That supports testing parallel work when inputs are independent; it does not establish the same result for coding tasks.
**[ReAcTree](https://arxiv.org/abs/2511.02424)** reports 61% goal success versus 31% for ReAct on WAH-NL with Qwen 2.5 72B. Its task-tree approach is useful when subgoals and dependencies are explicit.
**[The Organizational Behavior of Agentic AI](https://arxiv.org/abs/2606.30986)** finds that human-imitation organization forms often underperform shared-state or adaptive forms under its tested interface conditions. I take that as a reason to make handoffs inspectable, not as a universal architecture rule.
## What still needs work
**Elastic context (ACE).** [ACE](https://arxiv.org/abs/2606.31564) describes adaptive compression for message history. I have not implemented it. If governance itself grows during a large fanout, I would evaluate it against task-specific retrieval and summaries rather than assume one compression strategy is lossless.
**Dependency-aware fanout.** Right now, fanout assumes all workers are fully independent. If task B needs task A's output, governance must serialize them manually. ReAcTree's dynamic tree construction could automate this.
**Structured handoff standardization.** The YAML schemas I use are project-specific. A small vocabulary such as `status`, `findings`, `files_changed`, `blockers`, and `verification_gaps` is a useful starting point, but projects still need fields that match their tools and review process.
---
### runtime-skill-evals-as-assembly-theory.md
We compared coding-agent outputs with and without a loaded skill to see which behaviors changed.
Reading a skill can reveal unclear instructions, but runtime tests show how the agent responds to them. For example, a reproduction step adds little on a task where the agent already reproduces the bug without prompting.
You need a runtime test: run the same task with and without the skill, grade the outputs against assertions, and measure the delta. Anthropic's [skill-creator](https://github.com/anthropics/skills/tree/main/skills/skill-creator) does this via subagent spawning. We wanted the same thing, but using the [pi coding agent](https://pi.dev) as our harness.
The [skill pack](https://github.com/mihaiserban/skills) contains 29 skills for engineering workflows, design translation, git operations and research. Each skill is a `SKILL.md` file with frontmatter and instructions that an agent loads on-demand.
---
## The Method
The eval pipeline has three stages, all scriptable and CI-friendly:
```text
eval-runner → runs each eval with and without the skill (parallel)
eval-grader → grades outputs against assertions (batch LLM)
eval-aggregator → produces benchmark + review artifacts
```
The baseline needs **skill isolation**. In this harness, global skill directories are temporarily moved so the baseline cannot discover them. The other variant explicitly loads the tested skill and any declared dependencies.
For skills with dependencies (an orchestrator that routes to sub-skills, for instance), the eval declares those dependencies and the runner loads them all. Composition is a real architectural concern, not an afterthought.
Each eval carries 3–7 assertions that check specific, verifiable outcomes. The grader receives all assertions for one eval variant in a single model call and returns numbered PASS/FAIL verdicts. Those judgments still need review, especially when the score disagrees with the observed behavior.
---
## The Numbers
25 skills. 2 evals each. 100 total runs across 8 parallel workers.
97 runs completed. Three timed out in the "with skill" variant during code generation. The timeouts need investigation alongside the completed-run scores.
**20 of 25 skills show positive delta.** 4 show no measurable difference. 1 shows a negative delta.
---
## What the Deltas Tell You
The score differences suggest several places to inspect the outputs:
**Largest improvements.** Governance, design and audit skills had some of the largest gains in assertion pass rate. They specify a plan → delegate → synthesize workflow, a wireframe before code, or an audit rubric. These results concern the tested tasks, not everything the model can do without those instructions.
**Smaller improvements.** Some gains came from particular assertions, such as a git cleanup step or an output-format requirement. The individual outputs show which step the skill helped with.
**No measured difference.** The skill may add little on a given task, or the assertions may miss the behavior it changes. Equal scores alone do not distinguish these explanations.
**Lower score with the skill.** The domain-modeling variant asked for more context and scored 67 percentage points lower. Review the prompt and response to decide whether the request was warranted. The score alone cannot tell you whether the skill or the evaluation needs changing.
---
## Reviewing the results
The recorded 100-run benchmark took about 15 minutes with 8 parallel workers. Its per-eval outputs help identify changed behavior and failures. With two evals per skill and an LLM grader, broader conclusions need more tasks, repeated runs and a review of the judgments.
The [repository](https://github.com/mihaiserban/skills) includes the skills, harness and evals needed to run the comparison.
---
### runtime-skill-evals-with-pi.md
We ran the same coding tasks with and without agent skills, then compared the outputs against a set of assertions. This post covers the harness and the results from 25 skills.
The [repository](https://github.com/mihaiserban/skills) contains 29 agent skills for engineering workflows, design translation, git operations and research. Each skill is a `SKILL.md` file with frontmatter and instructions that an agent loads on-demand.
---
## The Problem
Static review tells you a skill is well-written. It doesn't tell you whether the skill changes outcomes.
A skill that says "always reproduce the bug before fixing it" is good advice. But if the model already does that by default, the skill adds tokens without changing behavior. You need a runtime test: run the same task with and without the skill, grade the outputs, and measure the delta.
This is what [Anthropic's skill-creator](https://github.com/anthropics/skills/tree/main/skills/skill-creator) does: spawn subagents with and without the skill and compare results. We wanted the same thing, but using the [pi coding agent](https://pi.dev) as our harness.
---
## The Harness
The eval pipeline has three stages, all scriptable and CI-friendly:
```text
eval-runner.py → runs each eval with and without the skill (parallel)
eval-grade.py → grades outputs against assertions (batch LLM)
eval-aggregate.py → produces benchmark.json + HTML review
```
The runner uses pi with full skill isolation:
```bash
# Without skill: zero skills loaded, no contamination
pi --no-skills --no-extensions -e ~/.pi/agent/extensions/gateway \
--no-context-files --no-session \
--model gateway/planner -p "eval prompt"
# With skill: only the tested skill, nothing else
pi --no-skills --no-extensions -e ~/.pi/agent/extensions/gateway \
--no-context-files --no-session \
--skill /path/to/SKILL.md \
--model gateway/planner -p "eval prompt"
```
The `--no-skills` flag prevents all skill discovery. Global skill directories (`~/.agents/skills/`, `~/.pi/agent/skills/`) are physically moved during eval runs to guarantee the baseline can't cheat. The `--skill ` flag explicitly loads the tested skill alongside `--no-skills`.
For skills with dependencies (like the design orchestrator that routes to picker → apply → audit), the evals.json declares `skill_deps` and the runner passes multiple `--skill` flags.
---
## The Evals
25 skills, 2 evals each, 100 total runs across 8 parallel workers. Each eval has 3-7 assertions that check specific, verifiable outcomes:
```json
{
"skill_name": "kill-dead-code",
"evals": [
{
"id": 1,
"name": "remove-unused-function",
"prompt": "Clean up this module. I think some functions are never called...",
"assertions": [
{"id": "identifies-dead", "text": "Identifies all four dead functions", "type": "quality"},
{"id": "keeps-live", "text": "Keeps the two used exports", "type": "quality"},
{"id": "warns-exports", "text": "Warns unused exports might be public API", "type": "behavior"}
]
}
]
}
```
Grading uses a batch LLM approach: all assertions for one eval variant go to a single `gateway/coder` call. The grader receives the model output in XML tags (to avoid code-fence collision bugs) and returns numbered PASS/FAIL verdicts.
---
## The Numbers
Of 100 runs, 97 completed and 3 timed out. All three timeouts were in the `with_skill` variant during code generation. The table shows assertion pass rates; delta is the percentage-point difference between the displayed rates.
| Skill | With Skill | Without Skill | Delta |
|-------|-----------|---------------|-------|
| governance-fanout | 89% | 11% | +78 pp |
| show-first | 85% | 15% | +70 pp |
| design-md-style-audit | 67% | 0% | +67 pp |
| pr-from-diff | 90% | 40% | +50 pp |
| design (orchestrator) | 89% | 44% | +45 pp |
| blog-post | 100% | 60% | +40 pp |
| context-budget | 88% | 50% | +38 pp |
| systematic-debugging | 83% | 50% | +33 pp |
| revert-surgical | 100% | 78% | +22 pp |
| changelog-from-diff | 100% | 80% | +20 pp |
| input-validation | 100% | 80% | +20 pp |
| design-md-style-apply | 83% | 67% | +16 pp |
| design-taste-distiller | 50% | 33% | +17 pp |
| research | 58% | 42% | +16 pp |
| kill-dead-code | 71% | 57% | +14 pp |
| decision-record | 100% | 89% | +11 pp |
| adversarial-verify | 100% | 90% | +10 pp |
| sql-review | 70% | 60% | +10 pp |
| secret-scan | 36% | 27% | +9 pp |
| clean-commits | 100% | 91% | +9 pp |
| design-md-style-picker | 100% | 100% | 0 pp |
| bisect-regression | 100% | 100% | 0 pp |
| contract-test | 90% | 90% | 0 pp |
| rebase-safely | 80% | 80% | 0 pp |
| domain-modeling | 11% | 78% | -67 pp |
**20 of 25 skills show positive delta.** 4 show no measurable difference. 1 shows a negative delta.
---
## What the Deltas Tell You
**Largest improvements.** The biggest gains came from skills specifying a workflow: plan → delegate → synthesize for `governance-fanout`, a wireframe before code for `show-first`, and an audit rubric for `design-md-style-audit`. The results show higher assertion pass rates on these tasks; they do not establish what the model could never do without a skill.
**Smaller improvements.** Other skills helped with particular assertions, such as a cleanup step in a git workflow or the output format required by `changelog-from-diff`. Inspect the individual outputs to see which behavior changed.
**No measured difference.** `contract-test` scored 90% with and without its skill; `rebase-safely` scored 80% in both variants. Equal scores could mean the skill adds little on these tasks, or that the assertions miss the behavior it changes.
**Lower score with the skill.** `domain-modeling` scored 11% with the skill and 78% without it. The skill-loaded variant asked for more domain context. Review whether that request was warranted by the prompt before deciding whether to change the skill or the evaluation.
---
## Running the Benchmark
```bash
# Full pipeline: run → grade → aggregate, all skills, 8 parallel workers
bash scripts/start-evals.sh --all --parallel 8
# Or step by step
python3 scripts/eval-runner.py --all --parallel 8
python3 scripts/eval-grade.py --all --parallel 8 --model gateway/coder
python3 scripts/eval-aggregate.py --all --output html
```
Each skill gets `eval-results/iteration-1/` with `benchmark.json`, `benchmark.md`, and a `review.html` showing per-eval outputs and assertion pass/fail.
Skills that reference other skills, such as the design orchestrator routing to picker → apply → audit, declare `skill_deps` in `evals.json`. The runner loads these dependencies with additional `--skill` flags.
---
## Reviewing a run
The recorded 100-run benchmark took about 15 minutes with 8 parallel workers. Use the per-eval outputs to investigate score changes and timeouts. Two evals per skill and an LLM grader are a starting point for finding problems, not a general verdict on each skill.
The [repository](https://github.com/mihaiserban/skills) includes the 29 skills, harness and evals. Run `bash scripts/start-evals.sh --all` to generate the results and review artifacts.
---
### semantic-search-assembly-reconstruction.md
A search for *"how do I take money out of my account"* should find *"Withdrawal Methods"*. Keyword search can miss that connection when the indexed text has no matching words. An embedding model may retrieve it because the texts express similar intent.
This is an example knowledge-base search architecture. The candidate counts and ranking scores below are illustrative, not production measurements.
## Lexical, semantic, and hybrid search
**Lexical search** such as BM25 is useful for exact strings including product codes, error messages, and proper nouns. **Semantic search** can retrieve paraphrases, but rare names and identifiers may rank poorly. **Hybrid search** combines candidates from both methods, for example with Reciprocal Rank Fusion, before reranking.
Compare against a lexical baseline when users search for identifiers or error codes. A hybrid approach adds retrieval and tuning work, so measure whether it improves representative queries.
## Two-stage retrieval
```text
Query → Query embedding → Vector search → 30 chunks → Reranker → Article results
```
A bi-encoder embeds documents independently of queries. Store document vectors ahead of time, then embed a query and retrieve nearby vectors. A cross-encoder scores the resulting query-document pairs together. It adds work for every candidate, so the candidate set should be bounded.
For the withdrawal query, retrieval might return chunks from *Withdrawal Methods*, *Bank Transfer Limits*, *ATM Cash Withdrawal*, and *Account Closure*. The reranker can reorder those chunks, after which the API groups them into articles. It cannot recover an article that retrieval did not supply.
## Model choice includes language and input formatting
One possible embedding model is [`intfloat/multilingual-e5-small`](https://huggingface.co/intfloat/multilingual-e5-small), which produces 384-dimensional vectors. Its retrieval inputs should start with `query: ` or `passage: `, including non-English text:
```text
query: how do I take money out of my account
passage: Withdrawal Methods. You can withdraw funds by ...
```
Follow the model's pooling and normalization guidance. L2 normalization makes the dot product equal cosine similarity; it does not calibrate relevance across queries. A score of 0.8 on one query need not carry the same meaning on another.
For English, [`cross-encoder/ms-marco-TinyBERT-L2-v2`](https://huggingface.co/cross-encoder/ms-marco-TinyBERT-L2-v2) is a small reranker to evaluate. Its model card is tagged English and describes MS MARCO training. Pairing it with a multilingual embedding model does not establish multilingual ranking quality. Evaluate a multilingual knowledge base in each supported language.
Benchmark inference with your text lengths, candidate count, batch size, and expected concurrency. Model names alone do not establish a latency target or whether a GPU is economical.
## Vector storage with PostgreSQL and pgvector
If the application already uses PostgreSQL, pgvector can keep search data in the same database and transactions. Here is a starting schema for 384-dimensional vectors:
```sql
CREATE EXTENSION IF NOT EXISTS vector;
CREATE TABLE embeddings (
id BIGSERIAL PRIMARY KEY,
article_id TEXT NOT NULL,
tenant TEXT NOT NULL,
language TEXT NOT NULL,
chunk_type TEXT NOT NULL,
text TEXT NOT NULL,
embedding VECTOR(384) NOT NULL,
created_at TIMESTAMPTZ DEFAULT NOW()
);
CREATE INDEX ON embeddings USING hnsw (embedding vector_cosine_ops);
CREATE INDEX ON embeddings (tenant, language);
```
```sql
SELECT article_id, chunk_type, text,
1 - (embedding <=> $1::vector) AS similarity
FROM embeddings
WHERE tenant = $2 AND language = $3
ORDER BY embedding <=> $1::vector
LIMIT 30;
```
Ordering by the distance operator with a limit makes the query eligible to use the HNSW index, although PostgreSQL still chooses the plan. Check it with `EXPLAIN ANALYZE` on representative data.
With approximate indexes, pgvector applies filters after scanning index candidates. A selective tenant or language filter can leave fewer than 30 results. Starting with pgvector 0.8.0, iterative index scans can search further up to configured limits. Depending on the workload, exact filtered search, partitioning, or partial indexes may fit better. Measure recall as well as query time. [pgvector filtering documentation](https://github.com/pgvector/pgvector#filtering)
A tenant column is one storage design, not an authorization boundary by itself. Derive the tenant from authenticated context and enforce article access rules in retrieval. Choose shared tables, row-level security, or stronger separation according to the application's isolation requirements.
## Chunking changes what can be found
Titles, summaries, and sections are useful starting boundaries. Split oversized sections to fit the model's token limit while retaining enough context to identify the chunk. For text without useful boundaries, overlapping token windows are another option. Tune chunk size and overlap against representative questions.
Each chunk points to its parent article. After reranking, one aggregation rule is to keep the best-scoring chunk per article. This avoids rewarding long articles simply for having many paragraphs, and means 30 retrieved chunks may produce fewer than 30 articles.
Chunk-type weights are a heuristic to test. With illustrative nonnegative similarity scores, a title weight of 1.0 and paragraph weight of 0.7 gives:
```text
Article A: Reset Multi-Factor Authentication
title = 0.78; paragraph = 0.74
weighted maximum = max(0.78 × 1.0, 0.74 × 0.7) = 0.78
Article B: Account Security Best Practices
title = 0.70; paragraph = 0.82
weighted maximum = max(0.70 × 1.0, 0.82 × 0.7) = 0.70
```
Without weighting, B wins with 0.82 against A's 0.78. With these weights, A wins with 0.78 against B's 0.70. The example shows how the heuristic can change ordering; it does not establish that the changed order is better. A paragraph discount cannot guarantee that a title match wins. If applying weights to reranker outputs, account for their scale: multiplying a negative score by 0.7 increases it rather than penalizing it.
## Ingestion and caching
For bulk imports or slow embedding work, an ingestion endpoint can validate and durably enqueue an update, then return `202 Accepted` with a tracking ID. A worker chunks, embeds, and stores it separately from search traffic.
Prepare replacement embeddings before removing current ones. Replace an article's chunks in a transaction scoped by tenant and article ID, so readers see either the old set or the new set. Give updates versions and make retries idempotent; an older job finishing late must not overwrite newer content.
A result cache avoids retrieval and reranking for repeated searches. Query-embedding caching is a separate option when the same query is reused with different filters. Stored document vectors do not eliminate query-embedding work.
```text
search:{tenant}:{generation}:{model_version}:{lang}:{access_hash}:{filter_hash}:{query_hash}
```
A result-cache key must include every input that changes the answer, including tenant, language, filters, access scope, and model or index version. Hash a canonical representation of the actual search inputs.
Redis `DEL` accepts literal keys. `DEL search:{tenant}:*` does not expand the wildcard. One invalidation approach increments a tenant generation after an index update and uses that generation in subsequent cache keys. Another iterates with `SCAN MATCH` and deletes returned keys explicitly. Neither makes a database write and a Redis update atomic, so handle invalidation failures and avoid caching an in-flight result under a newer generation than the one it searched. [Redis DEL](https://redis.io/docs/latest/commands/del/), [SCAN](https://redis.io/docs/latest/commands/scan/)
Choose the TTL from the allowed staleness. Permission changes may need stronger handling than ordinary article edits; cached results must not bypass current access checks.
## Measure before splitting services
Start with a deployment you can operate. Isolate ingestion from interactive searches when they compete for resources. Split embedding and reranking into independently scaled services when measurements show different capacity or release needs.
Candidate count, text length, batching, and concurrency affect reranker cost. Record throughput and end-to-end p50, p95, and p99 latency under load. Set a budget for the full request, including network and orchestration overhead. Stage timings locate bottlenecks, but adding stage percentiles does not produce an end-to-end percentile.
## Evaluate with knowledge-base questions
Build a labeled set of queries and relevant article IDs. Include paraphrases, identifiers, supported languages, access restrictions, and queries with no relevant answer. Keep a held-out set when tuning models, chunk sizes, or weights.
Track retrieval recall at the candidate cutoff, final MRR or nDCG, end-to-end latency, and freshness after updates. These measurements overlap: changing chunking or retrieval can change both the candidate set and final ranking.
When a query fails, inspect its trace. If the relevant article never entered the candidate set, check ingestion, chunking, filters, and retrieval. If it arrived but ranked poorly, inspect reranker scores and article aggregation first. Keep the failing query as a regression example.
---
### independent-contractor.md
Specializing in development and consulting for modern web and cloud-based applications, including:
- ReactJS front-end development
- AWS-based architecture and solutions
- Node.js back-end services
- Microservices architecture
- Mobile application development for iOS
Experienced in designing, building, and maintaining scalable applications across full-stack and cloud environments.
---
### ios-developer-skobbler-aquired-by-telenav-inc.md
At skobbler,
I was part of a large team of iOS and C++ developers building location-based applications powered by OpenStreetMap.
Some of the products I contributed to included GPS Navigation, ForeverMap, GeoBrain, and Blitzer.de.
__Contributions__
- Contributed to the development and continuous improvement of mobile navigation applications used by millions of users.
- Designed and implemented reusable components to support scalability and maintainability across projects.
- Performed code reviews and helped maintain high engineering and code quality standards within the team.
- Collaborated closely with the QA department to identify, track, and resolve software defects.
- Participated in Scrum ceremonies and agile planning sessions as part of an iterative development process.
---
### mentorship-program-itbrainiacs-apex-edu-telenav-collaboration.md
__ITBrainiacs__ is a program developed by __Apex-Edu__ in collaboration with __Telenav__
, designed to identify talented students and help them reach their full potential in software engineering.
The program pairs selected high-potential students with experienced software engineers in a structured 6-month one-on-one mentorship initiative.
__Role & Contribution__
- Mentored students in software development fundamentals and best practices
- Provided guidance on problem-solving, coding standards, and software engineering principles
- Supported mentees through hands-on learning, feedback sessions, and continuous technical coaching
- Helped bridge academic knowledge with real-world software development practices
---
### paternity-leavecareer-break.md
Career break to focus on family.
“You have little kids for four years and if you miss it. It's done. That's it.” - Jordan Peterson
---
### quality-assurance-engineer-skobbler-acquired-by-telenav-inc.md
__QA / Mobile Testing Responsibilities__
- Performed testing across multiple handheld devices and platforms, including Android, iPhone, BlackBerry, and Nokia devices.
- Automated manual test cases for mobile platforms, primarily Android and iOS.
- Designed, created, and executed test cases for mobile applications and device-specific functionality.
- Built testing environments to simulate real-world usage scenarios and operating conditions.
- Collected diagnostic information and extracted relevant logs to investigate and troubleshoot issues identified during testing.
- Reported and tracked defects using Jira.
- Maintained and updated test cases based on evolving project requirements and test plans.
- Worked independently with minimal supervision while managing testing responsibilities and delivery timelines.
- Provided release assessments and quality sign-offs to support production deployments.
---
### senior-ios-developer-3pillar-global.md
While at 3Pillar Global I was part of a cross site team (Cluj, Timisoara and US) working on [__Geico__](https://www.geico.com "Geico")'s insurance mobile apps.
This was a complex and high-responsibility project involving sensitive data such as payments and personal user information, requiring strong focus on security, reliability, and compliance. I collaborated closely with distributed teams across multiple time zones to design, develop, and deliver features while maintaining consistent quality across releases.
---
### senior-ios-developer-neosteq.md
I was part of a smaller iOS engineering team working on a companion application for portable navigation devices (PNDs). Focused on real-time device communication, mapping features, and performance-critical mobile rendering.
__Contributions__
- Implemented communication between PND and iOS devices using Google Protocol Buffers for efficient data serialization.
- Developed Bluetooth-based communication channels between devices.
- Implemented and maintained In-App Purchase functionality.
- Integrated multiple web services into the mobile application.
- Implemented weather alert overlays on maps using OpenGL rendering.
---
### senior-software-engineer-contractor-flutter-entertainment.md
I joined Flutter Entertainment as a Contractor Senior Software Engineer, primarily working on iOS and frontend development.
__Contributions:__
- Assisted the iOS team in migrating parts of existing web-based iOS applications into native iOS code, including feature implementation and code reviews for other contracting teams.
- Migrated a large in-house frontend platform from AngularJS (Angular 1) to a modern ReactJS stack using Redux and React Hooks.
- Rebuilt the Help & Support static website and improved the static site generation pipeline for Betfair Support.
- Migrated Cash Card & Cash Card Plus frontend functionality to a new ReactJS-based frontend architecture.
- Added new features to existing Vue.js and AngularJS applications, including authentication and role-based access control using Microsoft Authentication Library (MSAL).
---
### senior-software-engineer-flutter-entertainment.md
__Contributions:__
- Led the complete rewrite of the in-house LivePerson JavaScript messenger library, improving architecture, maintainability, debugging capabilities, integration flexibility, and automated test coverage; successfully migrated the new implementation (v2) into production.
- Implemented the Help Knowledge Service, a semantic search platform built with Python and sentence transformers, including a two-step retrieval pipeline for intelligent article discovery and ranking, as well as ingestion pipelines that process Help & Support content and store vector embeddings in a vector database for semantic retrieval and contextual search capabilities.
- Contributed to the migration from on-premise infrastructure to AWS cloud environments using AWS CDK and Kubernetes (K8s).
---
### senior-software-engineer-telenav-inc.md
During my time at Telenav,
I worked primarily as an iOS developer on the Scout navigation client, with a strong focus on Objective-C development.
I led a team of five developers, providing technical leadership and mentorship, maintaining coding standards through code reviews and documentation, and participating in technical interviews and hiring processes.
My responsibilities included designing and implementing new features, improving application stability and performance, and collaborating closely with cross-functional teams to deliver navigation and location-based functionality.
From mid-2016, I transitioned into a new team focused on developing a cross-platform desktop application using Qt, C++, QML, and JavaScript.
---
### blitzer_de.md
## Context
While working at skobbler I had the opportunity to contribute to the Blitzer.de, the #1 speed cam application on the German App Store.
It uses skobbler's map technology stack alongside Blizer.de up to date speedcam database to inform the users of upcoming speedcams.
## Responsibilities
- iOS development as part of a team of 3 iOS developers
- synchronize data from Blitzer.de database
- C++ development, mainly integrating skobbler's C++ rendering engine for map display, and contributing to adapt it for our use case. There was no map SDK for plug and play integration.
---
### callsign.md
## Context
Callsign has built a secure mobile multi-factor authentication and authorisation engine, through the introduction of patented machine-learning biometric, behavioural, geo-location and identity analysis, combined with traditional methods.
## Responsibilities
- participate in Scrum meetings, and provide clear reports of the work progress
- lead the development efforts on creating the interface for their Ruleset Manager using React and D3.js. The final product can be seen in the showcase video.
- assist the team with code reviews
---
### creative-navy.md
## Context
Creative Navy is a London based design agency which focuses on user research, user experience design and UI design. Creative Navy ranked Top-5-global UX agencies from 2017 to 2019.
## Responsibilities
Create a new website from scratch following their designs.
Google audit score in the 90th percentile.
---
### elho.md
## Context
iPad app created for the Elho sales team to showcase all of Elho's products. Elho is a fast growing family company, specialized in plastic plant pots.
## Responsibilities
- iOS development
---
### forevermap.md
## Context
ForeverMap by Skobbler GmbH is an offline navigation application available for iOS (iPhone/iPod Touch/iPad). ForeverMap provides address/POI search, route calculation and Wikipedia information. OpenStreetMap Maps and POI data is the main source of information of this app.
## Responsibilities
- iOS development as part of a larger team
- code reviews, follow best practices
- participate in daily Scrum meetings
- provide mentorship to fellow collegues
---
### geobrain.md
## Context
GeoBrain is a interactive geo quiz game available on the iPhone and iPad. I was the only iOS developer working on the project.
Project included working with SQLite databases, networking, implementing game logic according to specified workflows, mixing OpenGL with UIKit elements.
## Responsibilities
- iOS development
- participate in daily Scrum meetings
---
### impetus.md
## Context
Impetus is a platform for reward based advertising and the cryptocurrency to run it. Meet Impetus One and the Nudge token. It’s where brands meet customers who actually want them in their lives.
Advertisers come up with and pay for brand missions consumers complete.
The fee is split between the customer, and the ad publisher where the customer joined the mission, with the smallest share for the platform.
Blockchain brings in low transaction fees, high velocity and geographically unbound means of currency distribution.
## Responsibilities
- ReactJS development
---
### next_nomads.md
## Context
NextNomads is designed to be a network of coworking spaces around the world, where freelancers, entrepreneurs and urban nomads can work whenever needed. The app lets users access the list of spaces via a map and shows the nearest offices and their amenities. It also gives access inside the offices, letting the users in via account token/wireless unlocking of the gates/doors.
## Responsibilities
- iOS development
- testing
- provide clear progress reports to the client
---
### scout_global.md
## Context
Scout is a map and navigation app for iOS devices (iPhone and iPad with cellular support) built on top of OpenStreetMap.
Features
- online and offline map
- shows traffic on the map with data by Inrix
- shows speed cameras that were reported on the german platform blitzer.de
## Responsibilities
- lead a team of 5 iOS developers
- iOS development
- mentorship
- code reviews, follow best practices
- participate in daily Scrum meetings
- maintain clear communication with the C++ team, QA Team and Project Management
---
### we_style.md
## Context
WeStyle is a social media application which offers instant style feedback plus discovery options that shift style uncertainty into total outfit confidence.
It alows the user to share his fashion style with a like minded community, and receive feedback.
## Responsibilities
- iOS development
- project managment
---